Showing posts with label vegetarian. Show all posts

26 November 2014

Lekker: Vegan Sweet Potato & Black Bean Chili

Hello there, and Happy Thanksgiving pals!

As a foodie, I'm sure you can imagine that this is very nearly my favourite holiday of the year. Christmas is my actual favourite, but only because it's LONGER. Because Turkey Day is just one day I feel like Thanksgiving never really gets its proper due, so when I grow up, I plan to host quarterly Thanksgiving dinners at my house. There's just too many cool recipes I want to try, with only one chance per year! Bollocks, in my opinion. (That plan hinges on the obviously faulty logic that I will, in fact, one day grow up--but nevermind.) 

Surprising to no one I've been planning my Thanksgiving menu since sometime in September, and I ultimately decided that sweet potatoes were axed from this year's menu. Since it's just my Dad, my 20-year-old body building brother Champ and I for dinner this year it's quite the small party and thus I had to be painfully limited with my side dishes. Champ, of course, threw a hissy fit when he found out I wasn't doing a sweet potatoes because of course he doesn't care about anything ever but the **second** I say no to something it's immediately the most important thing ever ever ever--but I'M IN CHARGE HERE DAMMIT!

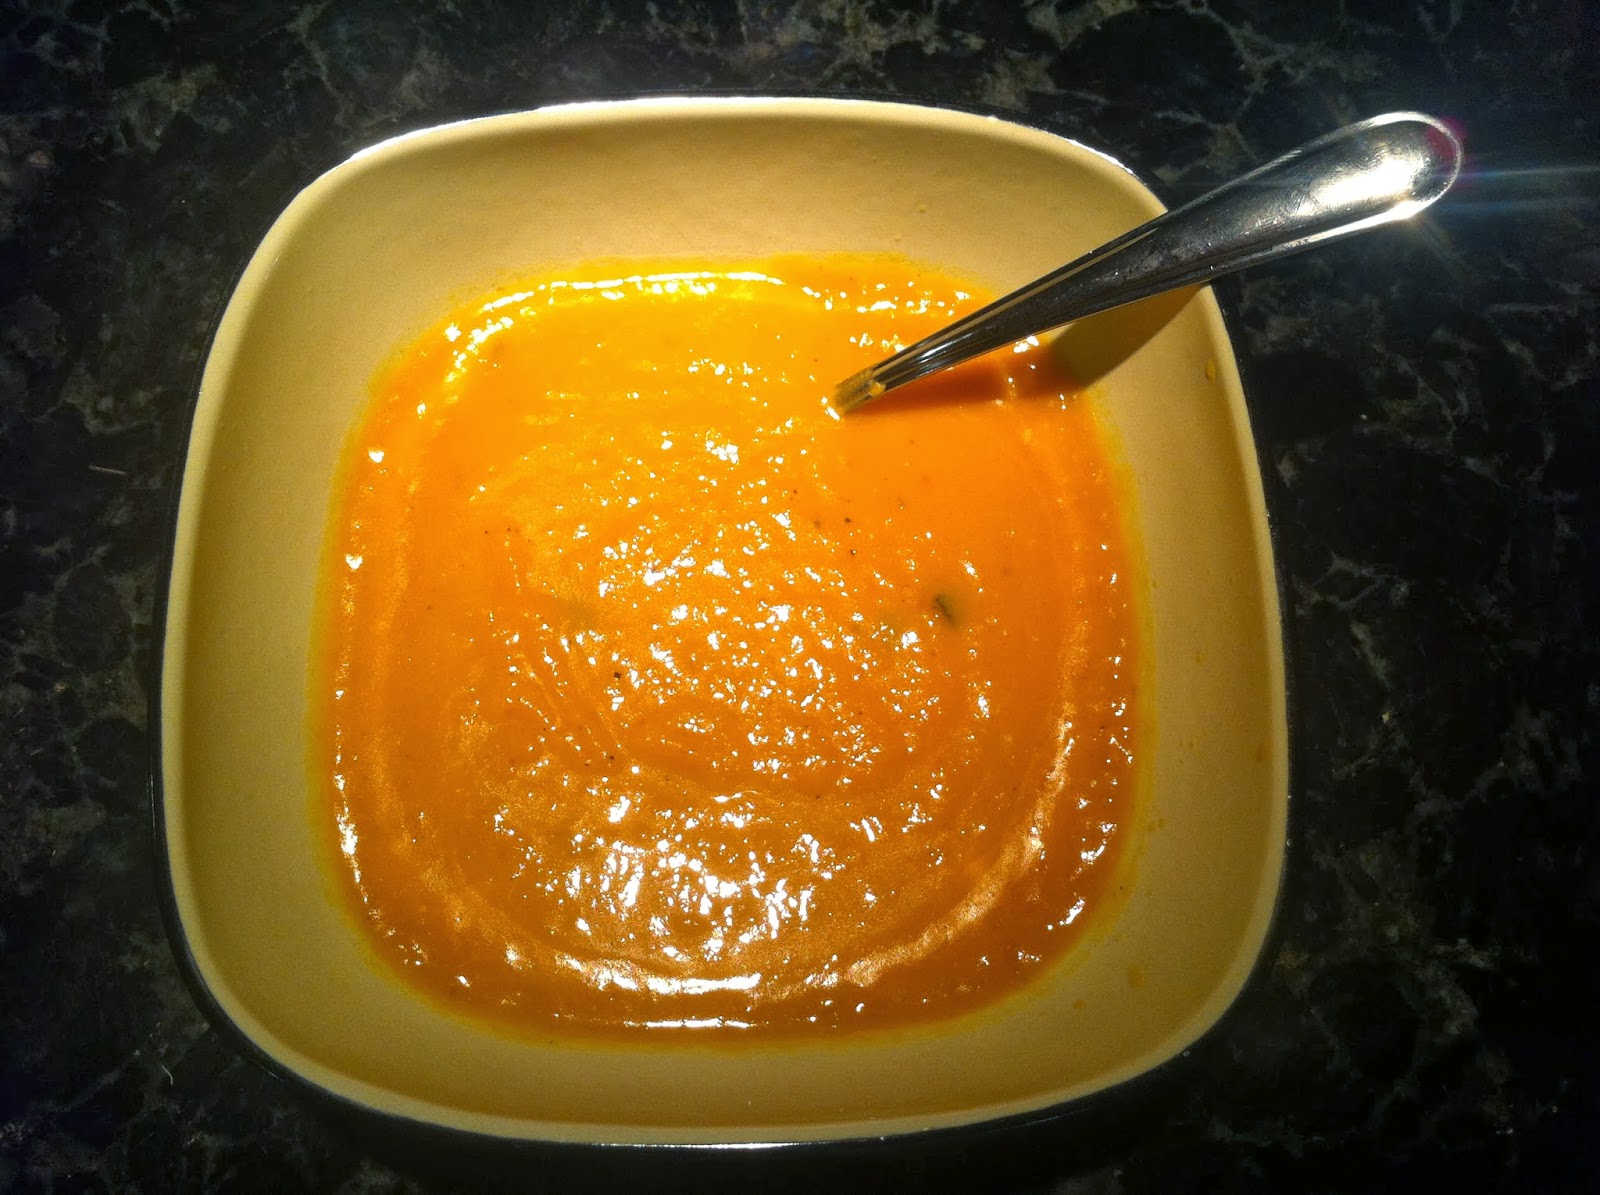
To yield to the sweet-potato-based pressure, I cooked up this vegan sweet potato and black bean chili for dinner. None of us are vegans here, I assure you, this is completely by chance--but it's so lean, filling, and chock full of wholesome things, it's something to feel good about eating before you dive in face first unapologetically into the gluttony and gravy-induced stupor that is Thanksgiving.

Chili never looks particularly appetizing, but damn if it isn't delicious. And yes, my father ruined the "vegan" aspect by topping it with a mountain of shredded cheddar cheese.

Vegan Sweet Potato Black Bean Chili
serves 4

What You Need:
1 very large, 2 medium, or 3 smallish sweet potatoes, peeled and diced into a small dice
1 teaspoon paprika
1/2 teaspoon salt
Freshly ground pepper
2 tablespoons olive oil, divided
1 red or green bell pepper, diced
1 medium onion, diced
4 cloves garlic, diced
1 green jalapeno, seeds removed and flesh diced
1 teaspoon ground cumin
1/2 teaspoon oregano
 3 1/2 cups cooked black beans (that equals 2 15-oz tins, or see my note below if you want to try cooking them from scratch)
4 teaspoons adobo sauce from a tin of chipotle peppers in adobo sauce (if you like your chili more on the spicy side, feel free to add in one of the chipotle peppers, chopped)
1 28-oz tin diced tomatoes with their juice
1 teaspoon white granulated sugar
1 teaspoon unsweetened cocoa powder
1 cup water or vegetable broth, to thin it out

Optional, To Screw Up The Whole Vegan Thing: Sour cream or shredded cheese, to serve

***On black beans from scratch:***
My Mother, God rest her soul, was born and raised in Guatemala on the traditional staple diet of black beans and rice. Do you think they use tinned beans down there? LOL, no. That's an American convenience, but after cooking my own beans from scratch this weekend I understand WHY it's such a convenience. Holy shit, cooking dry beans from scratch takes forever. Now, research on the great wide Internet tells me the age of the beans has a lot to do with the cooking time and I'm not kidding when I say that because I dug this particular batch of beans up from the back of my Dad's pantry, I am therefore estimating their age at AT LEAST 6 years old. But, cooking the beans is not that hard, just time consuming: In order to yield about 3 1/2 cups of cooked beans, I used just about 1 1/4 cup of dry beans. I rinsed them under running water in a sieve, and then soaked them in cold water overnight. The next day I drained the water and tossed them in a small pot, covered with water, added 1 teaspoon of salt, and let them simmer merrily away...for SIX HOURS. Six hours! I had to top off the water a couple of times to make sure the beans stayed properly covered, and stir a few times, but that's about it.

So, is it a hassle to make your own beans from scratch? Yes, I think so, because it requires advanced planning and more effort. That said, I would do it again in a heartbeat. Why? Because as the beans cook they release starch and flavouring into the cooking water, yielding this black salty broth that acted as my liquid in the chili recipe, and tastes AMAZING. Like I could sip that from a mug all day in bliss. These are the beans I remember from my childhood, and if you did a taste test of beans from scratch next to tinned beans, I absolutely guarantee without a doubt that the beans from scratch will come out on top, every time.

That's it for my rant on beans for now, but I'm planning on writing a whole separate blog post on them shortly about how to select and cook them, store them, and freeze them--and more importantly, why you should definitely, positively, should be putting them in and around your mouth.

What You Do:
1. Preheat your oven to 400 degrees F and line a baking sheet with foil. On it, toss together your diced sweet potatoes, paprika, salt and pepper to taste with only 1 tablespoon of the olive oil and spread out into a thin layer. Roast for 25 minutes, stirring once in between. Remove from the oven and set...somewhere. Aside. Out of your way.
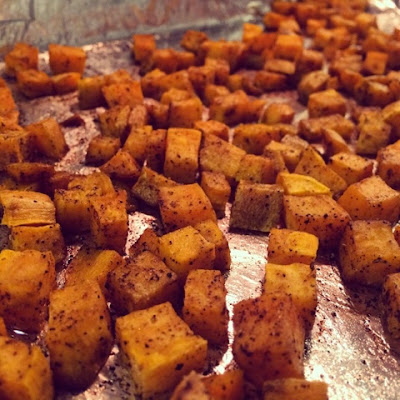
Roasted sweet potato is the best sweet potato and there will be no debate on that fact.

2. In a large pot over medium heat, heat your olive oil and saute up your onion, bell pepper, garlic, jalapeno, cumin, and oregano until everything is nice and soft. Add in the black beans, the tin of tomatoes, adobo sauce, sugar, and cocoa powder. Stir. (Note: at this point, I added 1 cup of the black bean broth because the chili was too thick to simmer properly. If you opted for tinned beans, add in a cup of water or vegetable broth here.)

3. Bring the mixture to a simmer, then reduce heat to low and let it simmer merrily away for about 30 minutes, stirring occasionally. Then add in your sweet potato. Simmer for another 15 minutes-ish or until all heated through nicely.

Dunzo!

There are zillions of chili toppings, of course, but in my house we dig shredded cheddar cheese and saltine crackahs. Cheese is obviously not vegan, but there are vegan cheese options so if you're that into it, by all means, have at it.

21 July 2014

Lekker: Stuffed Portobello Mushrooms

So my Dad's been on a bit of a mushroom kick lately and every weekend I come home, he buys a pair of portobello mushroom caps for us to have. Please don't ask me to explain any further because I really don't know.

Anyway, last night I realised we had some spinach in the fridge that needed using and stuffed mushrooms became pretty obvious. Grievously, I forgot how much mushrooms shrink when they cook, so with one mushroom a piece (even topped with a poached egg for some filling protein) we were a bit underfed. So to that end, I suggest you employ these as a side dish to chicken or steak; or double the portion per person to serve as a full dinner with a salad on the side; or perhaps for brunch as well. No matter what though, it's easy, fast, and delicious!

See? OK, the mushroom shrinks quite a bit so...yeah...I promise it's there and it's yummy. The molten egg yolk creates a rich sauce that pulls everything together. Oh, and? I recognise this is a crappy Instagram picture. The photography struggle in my Dad's kitchen with flickering fluorescent lights is REAL, I tell you.

Stuffed Portobello Mushrooms
serves 2 as a side dish; or double to create a proper meal for brunch or lunch with a salad

What You Need
2 portobello mushroom caps
1 very large handful fresh baby spinach, chopped finely
1 Roma tomato, seeded and finely diced
About 1/2 cup breadcrumbs (We didn't have any pre-made panko breadcrumbs in the house so I just made my own using a piece of whole wheat bread grated on a box grater. Spread it out on a pan lined with aluminum foil--you'll reuse the same one to bake the mushrooms so you're not dirtying another dish--and spray with cooking oil of your choice. Bake at 375 for about 4 minutes and they'll be crispy and good to go.)
1/2 cup of grated cheese of your choice (I used grated extra sharp cheddar since that's what we had but feta, Parmesan, or any other hard cheese would be great here.)
1/4 teaspoon dried oregano
S & P, to taste
1/2 teaspoon olive oil, maybe

Optional: two eggs, poached, to top

What You Do
1. Preheat your oven to 375. As with all mushrooms, first wipe them down with a damp paper towel to get off any excess dirt. Then, using a spoon, gently scrape out the dark gills on the underside. I've never been formally told to do this, but they REALLY freak me out and don't look delicious at all, and I know other people do it, so--follow the crowd. Do it. Also creates a deeper bowl to stuff more delicious things in.


2. In a small mixing bowl, combine the spinach, tomato, breadcrumbs, cheese, oregano, and salt and pepper. If it looks very dry and isn't bonding well, add a bit of olive oil to bond it all together.

3. On a small baking sheet lined with foil, lay your mushroom caps upside down. Spoon the mixture into the cavity until it's well heaped.

4. Bake for 10 minutes, and then turn on your broiler and broil for about 2-3 minutes to get the breadcrumbs right on the top nice and crispy.

You can be busy poaching your eggs while the mushrooms are baking, if you opt to serve them that way, which you should, because I said so. I can't WAIT to make these for brunch this weekend, perfect alongside a mimosa or seven.

29 January 2014

Lekker: Perfect Mashed Potatoes

I'm going to cut straight to the chase here: I HAVE DISCOVERED THE SECRET TO PERFECT MASHED POTATOES. 

Ready?

It's baking powder. Wut.

The few people to whom I have divulged this secret thus far have greeted me with skepticism, confusion, and befuddlement. Yes. I know. It's totally weird. Nonetheless, somehow I found myself on this webpage the other day featuring an old recipe for "French Mashed Potatoes" from a Better Homes & Gardens Cookbook that does in fact call for one teaspoon of baking powder. I couldn't wait to give it a try, to see if this really WAS the Holy Grail of mashed potatoes, for my dinner last night of Bangers 'n Mash with Bacon Braised Collard Greens (recipe for that coming soon).

The verdict: yes, it really does make a difference. Yes, they really were fluffy clouds of comfort food. And ya know, I know this is legit, because I didn't do anything else differently this time except adding the teaspoon of baking powder! I'm curious to know how it works, because baking powder is a chemical leavener that contains both the acid and the base required to create a release of CO2 gases that then create that fluffiness, but you'd think that potatoes wouldn't have enough "liquid" in order to make proper use of that theory...hmm. In doing some research on the topic this morning, I stumbled across this hilarious thread of people fighting about mashed potatoes on the Internet. Because apparently that's a thing that people do. I can only assume that it ended with the brandishing of beaters at the computer screen.

Anyway, what follows is what I have defined as my go-to, do-it-in-my-sleep classic mashed potatoes recipe. I've included options at the end for ways to change it up, as well as my just-as-delicious dairy-free version, but if you've yet to master this beloved side dish give it a shot!

Alright well fine they don't look as good as they taste here but we've already established I suck at photography and besides food is for eating anyway. So just...eat it.

Perfect Mashed Potatoes
serves 4

What You Need
4-6 medium Yukon Gold potatoes, peeled (The type of potato you use *IS* important! Don't just go picking up any bag, and don't assume that Russet potatoes are the gold standard. They are not. Gold potatoes are the gold standard. No but seriously, certain potatoes are better suited for certain purposes according to their "waxiness": hardy red skinned potatoes typically hold up well for potato salad but make a very starchy and heavy mashed potato; Russet potatoes are excellent for baking; and Yukon Gold [or other "gold"] potatoes are the creme de la creme for whipping into mashed potatoes.)
4 T salted butter
1/3 cup light cream
1 teaspoon baking powder (powder, not soda)
1/2 teaspoon salt
Dash of ground black pepper

What You Do
1. Peel and dice your potatoes into chunks about 1/2 inches big. Doesn't have to be scientific, just try to get them all a similar size. Dump them into a medium sized pot and cover with cold water, salting the water well. Bring to a boil, then down to a simmer for about 20 minutes or until the potatoes are fork tender. Try not to let them overcook to the point where they're falling apart in the water, as they become waterlogged and soggy that way.

2. Once the potatoes are done, drain them well of water and add the butter, cream, baking powder, salt, and pepper. Beat with a hand mixer for only about 2 minutes or until well beaten and fluffed. If you don't have a hand mixer, mash them up as best you can with a potato masher and then whip vigorously with a whisk. It's a good arm workout. Ta-dah! You're done!

 There are a zillion ways to jazz up your mashed potatoes if you're bored of the classics:
  • Boil the potatoes in chicken broth or stock instead of plain water.
  • Beat in some snipped fresh chives or spring onions to add colour.
  • Make indulgent cheesy mashed potatoes by adding half a cup (or more lol) of shaved Parmesan or cheddar cheese.
  • Crispy bacon pieces on top. Duh.
  • For tangy Southern potatoes, switch in buttermilk in place of the light cream.  
  • Stir in some oven roasted garlic for garlic mashed potatoes. Instructions for how to roast garlic can be found in my previous blog entry for Roasted Tomato Garam Masala Soup.
  • To make dairy free mashed potatoes, use Earth Balance "butter" in place of regular butter and swap out original coconut milk (NOT flavoured obviously) for the light cream.

30 October 2013

Lekker: Pumpkin Soup

You know what success tastes like? THIS SOUP. No, really. I am so thrilled to have finally mastered a recipe for pumpkin soup I could SING! 1, because I refuse to be defeated with crappy recipes when I have my mind set on something and 2, because I am so. sick. of pumpkin by now. Trust me, I've gone through about 3-4 different recipes in my pursuit of perfection and since I was raised with a "third world country" mentality I can't justify throwing food away--so I've been eating a lot of pumpkin soup. And there's nothing more frustrating that eating something that isn't quite right! Too garlicky. Way too spicy. Too rich and unhealthy. Sigh.

And then, over the weekend, finally...perfection. I tossed all the recipes in the rubbish bin and decided to wing it, and whaddaya know...finally, something I can rave about. Huzzah! Not only is the colour of this soup beautiful and vibrant, but it lets the pumpkin shine as the main ingredient while still maintaining a complex flavour profile. It's also super easy and quick to whip up--and even better the next day.


Pumpkin Soup
makes about 3 servings

What You Need
2 tablespoons butter
1 medium shallot, diced
2 small leeks, white and light green parts only, washed well and thinly sliced
1 stalk celery, sliced in half lengthways and diced small
1 clove garlic, minced
1 1/2 teaspoons fresh sage, minced
1/2 cup dry white wine
2 cups pumpkin puree (Make your life easy and use the tinned stuff; just make sure it's pure pumpkin and not pumpkin pie filling)
3 cups low-sodium chicken broth
3 tablespoons heavy cream
freshly ground pepper, to taste

You'll need an immersion blender for this one, or, work in batches pureeing in a standard blender.

What You Do
1. In a medium saucepan over medium-low heat, melt the butter until the foam subsides and it turns a lovely light golden-brown colour. Keep  close eye on it, as it can go from beautifully nutty and brown to blackened and burnt within seconds. Add your shallot, leeks and celery and saute for 5-7 minutes or until soft and golden brown. Add the garlic and sage and cook for 1-2 minutes more until fragrant.

2. Pour in your wine and let it simmer and reduce until there is no liquid left. Add the broth and the pumpkin puree and stir well to combine. Simmer for about 15 minutes, stirring occasionally.

3. Remove from heat and puree with an immersion blender. Taste, and adjust salt and pepper as necessary. I find I usually need about 4 turns from a pepper grinder, and actually I don't use any salt since I think the broth is plenty salty enough. Stir in the 3 tablespoons of heavy cream, and serve!

If you wanna be all fancy-pants, serve it with a couple of whole sage leaves fried quickly in butter. A multigrain, highly seeded bread would be delicious toasted alongside this.

28 October 2013

Lekker: Potato-Leek Soup

Oh god. I feel so guilty for posting yet ANOTHER soup recipe. (And there's a second one in the chute...) I'm sure I've lost ALL of my male readers (those that aren't sick and making my Italian Lemon Chicken Orzo Soup, anyway) with the dearth of salads and soups that've been on here lately. What can I say for myself? Most of the time I'm solo, and I like soups! I can make a big batch and have lunch or dinner for a few days, and because I'm not expected to feed a man I don't have to feel obligated to make "real food." And, it's "soup season" because it's fall and blah blah blah.

I promise, I have plans for "real food" in the coming weeks--Sticky Chutney Chicken, Tex-Mex Chili, Bucatini Bolognese and some to-die-for buffalo chicken sandwiches that are *perfect* for football Sundays. This wasn't even planned for today; it only happened because my housemate TB and I spent the morning harvesting the final crop from the garden before tearing it up for the winter, and it yielded a shit ton of leeks and potatoes.

Not to mention...sweet potatoes. BOATLOADS AND BOATLOADS OF SWEET POTATOES.

But for now, one of my absolute favourites--Potato Leek Soup. Of all the versions I've tried and tinkered with, this one is my favourite because it's largely dairy free except for the butter, but just as rich and creamy as you'd wish. I love serving this with a hearty slice of garlic bread, just like my mother used to, and a crisp green salad. TB raved about this recent batch and subsequently cleaned me out of my dinner for the rest of the week. Oh well. :)


Potato Leek Soup
makes 4 servings

What You Need
2 T butter
2 leeks, white and light green parts only, washed well and sliced thinly
1 large yellow onion, diced
3 cloves garlic, minced
2 large Yukon Gold potatoes, peeled and diced into 1/2 inch pieces (I find Yukon Golds to be the smoothest and richest potatoes for mashing or pureeing)
4 cups low-sodium chicken broth (or you can use vegetable broth to make this completely vegetarian)
1 teaspoon dried rosemary
~1/2 cup of water, to thin

You'll need an immersion blender for this soup, or, work in batches to puree in a regular blender.

What You Do
1. In a medium saucepot over medium heat, melt the butter until the foam subsides and it turns a light brown colour. PLEASE be watchful, as it can go from beautifully brown to blackened and burnt within seconds. Browning the butter, though, gives it a nice colour and slightly nutty flavour. Toss in your sliced leeks and chopped onion and saute for about 7 minutes or until soft and golden brown. Add the garlic and rosemary and cook for 1-2 minutes more until fragrant.

2. Pour in your chicken broth and add your potatoes. Cover and bring to a boil, then simmer for about 20 minutes or until the potatoes are completely tender. Remove from heat.

3. Using an immersion blender, puree until smooth. At this stage I found that I needed to add 1/2 cup of warm water to thin it out to a consistency that I preferred, but use your judgement.

TB wanted the flavours of a baked potato, so he topped his soup with some shredded cheddar cheese and bacon crumbles. It was, in a word, divine. I'm a simple girl though and this soup is so flavourful I love it as-is. It's warm, rich, and sticks to your ribs for those disgustingly chilly winter nights that are sure to come this season...

Bon appetit!

7 October 2013

Lekker: Roasted Tomato Garam Masala Soup

Oh no...two soup recipes in a week? Shit, must be fall yo!

I whipped this baby up this weekend in between episodes of Mad Men (rewatching; goodness Betty Draper drives me just bananas--grow a backbone, lady!) as an alternative to traditional tomato soup. Don't get me wrong, tomato soup and grilled cheese is one of my favourite meals ever and sooo comforting on a rainy day. Not that it was raining here, but anyway--I'm interested in creative spins on that traditional American combo and this is totally in the running: a roasted tomato soup with lots of garlic and onion, and a big Thai kick from the garam masala spices and coconut milk. What to serve it with? When I do this next time, I'm grilling up a naan and paneer cheese sandwich. NOM!

Don't be intimidated by the unfamiliar ingredients; they are all easy to find if you know where to look.

Roasted Tomato Garam Masala Soup
makes about 6 servings

What You Need
14-16 Roma tomatoes, sliced in half lengthways
2 large yellow onions, sliced in thick chunks (I don't care how you wanna do this; quarters, chunks, rings, whatever--just make them similar in size to the tomatoes)
2 whole heads of garlic (you can take it down a notch to one head if you're really anti-garlic or something, but know that roasting them really mellows their flavour and brings out just a lovely carmelised sweetness)

olive oil or whatever oil you prefer for roasting
1 can coconut milk (reserve a couple of teaspoons for a pretty garnish)
~2 cups chicken broth, or vegetable broth if you want to make this entirely vegetarian
3 tablespoons tomato paste
2 teaspoons garam masala
1/4 teaspoon red chili pepper flakes or 1 teaspoon of sriracha sauce
1 1/2 teaspoons dried cilantro, or a comparable amount of chopped fresh cilantro
about 8 stalks of fresh parsley, leaves chopped roughly (toss the stems in your compost pile)
salt and pepper, to taste

What You Do
1. Preheat your oven to 400 degrees. The first thing you have to do is get the garlic in the oven because those take the longest to roast (about 45 minutes). If you've never roasted garlic before, it's really easy. Just rub off the excess papery skin, leaving the whole bulb intact. Slice off the top 1/3 of the bulb so that the individual cloves are exposed. Pour olive oil over top until the cloves are well coated, and wrap up in aluminum foil and throw in the oven. If that wasn't clear enough, here's a tutorial, except I don't bother with the baking tin; I just wrap them up into little foil bundles and have done with it.

2. While that's going, line a baking sheet with foil. In a large bowl, toss the halved tomatoes and onion chunks with enough oil to lightly coat and season with salt and pepper.  Spread out evenly on the baking sheet and add those to the oven. Roast for 20 minutes, stir, and roast for about 15-20 minutes more, or until the onions have gone golden brown (maybe a little blackened in some places, that's okay) and the tomatoes have broken down and are brown in spots. QUITE CONVENIENTLY, an episode of Mad Men runs about 48 minutes, so...I'm not *saying* my timing is perfect, but it kind of is. 


3. Everything roasted? Sweetness! In a large stockpot, throw in the tomatoes, onions, roasted garlic, coconut milk (treat that can like a Shake Weight before you open it otherwise it'll be all separated and weird; nothing wrong with the Shake Weight, nothing at all), 1 cup of broth, tomato paste, garam masala and chili flakes. Bring to a simmer and cook for 5-10 minutes. Now, you'll need to either use an immersion blender to blend this all up, or work in careful batches in a blender until smooth.

4. Now that it's all blended you can add the cilantro and the parsley, and add the remaining cup of broth adjusting to the thickness that you like for your soups. I'm not gonna hunt you down if you like it a little thicker...baha. Heat for about another 10 minutes at a gentle simmer and serve with a pretty drizzle of coconut milk and a couple of leaves of fresh parsley. Look at you all fancy. If you like it spicier, add in a gorgeous drizzle of extra sriracha. (I find that the coconut milk adds such a rich, gorgeous creaminess that I want to contrast it with a decent kick.) Done! Next time, I think I'm going to pass the soup through a strainer quickly before serving to remove some of the fibrous leftovers from the tomatoes.

A couple of notes:

* Garam Masala is a spice mixture common in Indian and Southeast Asia. I had a difficult time finding it in the grocery store, but in TARGET, of all places, I found it in their Archer Farms line of spices. I imagine you could find it at an Asian or Indian foods market as well, and of course there's always the great wide Internet if you're really determined. 

* Coconut milk is much more common nowadays so you shouldn't have any trouble finding it. I found the tin in the Asian foods section of my local supermarket, but it's also available in cartons. Just make sure you get an unflavoured kind and if you use a carton, you'll need about 1 1/2 cups' worth. 

* I mentioned I would serve it with a grilled naan and paneer sandwich. Naan is flat bread from the Middle East, so I guess I'm doing a bit of a fusion thing there, but it's easy to find--usually by the imported cheeses, by the deli, or by the bread in your store. Paneer is an Indian cheese that I simply can't find, though my search is not over. In the interim, I would use a fresh white cheese of any kind--queso fresco comes to mind. Hell, you could even do a grilled naan and FETA sandwich here that would be AWESOME! Just pick any mild, white, solid cheese and you're good to go.

* If you don't like Indian food, and don't like curry, or Thai or Indian flavours, and hate trying new things, and expanding your culinary palate--don't eat this. You'll be pissed that "I gave you this crappy recipe" and I'll be pissed that you're a dumbass.

Now if you'll excuse me, it's time for a martini with Don Draper. Hello, Don...

3 September 2013

Lekker: Let's Talk About Sauces: Blue Cheese Sauce

I've always been a gravy girl. As a little kid I would beg and plead with my Mom to let me eat the gravy from a roast chicken or a pot roast--that and nothing else. Those who know me well know to double their gravy portions for a dish if I'm coming over. I don't know why I love it so much, but that same strange obsession expanded into other types of sauces as I got older and explored more. Sauces seriously should be their own food group.

Soooo, over the next couple of days I'm going to be sharing a few of my favourite sauce recipes while I work on batches of other things.

Sidebar: the more I type it the weirder the word "sauce" looks, and sounds in my head. I once forgot how to properly say the word "vegetables" because I repeated it an incorrect way over and over in my head. I can't find the clip on YouTube, but the bottom line is that it's Tigger's fault. The bouncy jerk from Winnie-the-Pooh, him.

Anyhoodles, this recipe is for the most idiot-proof, simplistic and most delicious blue cheese sauce I've EVER come across. I am not at all exaggerating when I say that a fight once broke out at a dinner party over who would get to lick the pan after I made this. Previously, I had also smacked a dear friend with a wooden spoon (hard) because he licked the spoon before I could. (Brat.)

I always serve this dripping over some simply sauteéd pork chops, but it works just as fantastically over a steak too. It's amazing as a drizzle over some roasted veggies if that's your thing. Or just through a straw. Whatever. I'm not here to judge.

Baller Blue Cheese Sauce
the amount of blue cheese you decide to use will determine how much sauce you have, so just eyeball it depending on how many people/pork chops you have

What You Need
1 cup of higher quality crumbled blue cheese, or Gorgonzola, if that's what you can find (I'm not saying "higher quality" to be a food snob here, but in my experience, the store brands are really shitty dried-out chalky shams of what blue cheese should be--so go to the deli or imported cheese section to find something slightly better. With cheese, as with men, never settle!)
~3 tablespoons heavy cream (No, you may not substitute half-and-half here to make it "healthier"--this is a sauce MADE OF CHEESE, what are you doing. Stop it with that.)
Freshly ground black pepper

Seriously, that's it.

What You Do
As I said, I usually use this with pork chops, so after I'm done sauteéing those and they're staying warm somewhere else, in the empty pan with all the lovely pan drippings in it (drained of fat though) throw in the cheese over very low heat. Add the heavy cream and stir constantly with a wooden spoon until the cheese is nicely melted. (Employ aforementioned wooden spoon to smack grabby hands away from dipping in to "just taste".) Use the heavy cream to adjust the consistency of the sauce. If you seriously need me to explain that to you, it means add more cream if you prefer it runnier, and cook it down slightly if you like it thicker.  Add black pepper to taste and just TRY to avoid inhaling all of it before you can spoon it over the chops.


Blue cheese, courtesy of someone named Charlotte Julienne on Google, because I'm fresh out of my own photos of blue cheese lying around. Oddly, when I Google image searched "blue cheese" there were a BUNCH of images of pot. I don't know what's going on in the world of marijuana at the moment, but apparently that's a thing. Blue Cheese Weed. K.

20 August 2013

Lekker: Cheesy Baked Spaghetti Squash

Here's another little gem that was pinged my way by the mysterious Lucas, shared between housemate TB and I for dinner last night. He's getting back on his vegan/vegetarian diet so we're making good use of the overabundance of vegetables from our garden, and everything you see here was grown by him. On a personal level, it always pleases me when I have an opportunity to show my gratitude to TB for being such a thoughtful, caring and creative housemate. He informed me last night that he's planted spinach, turnips and beans for the fall simply because I made a throw-away remark last week that I'd never cooked with turnips before and wanted to. He's awesome, right?! Thank youuuuu Craigslist!

I also like this recipe because it's INTENDED for two people. Come on y'all, don't be #foreveralone on this one--call up a friend or neighbor to join you (or a secretly despised enemy...just remember which half you put the arsenic into.)

The photo does not do this justice; I dunno WHAT was going on with my iPhone/kitchen lighting here...trust me, it's delicious. 

Cheesy Baked Spaghetti Squash
makes 2 large servings

What You Need
1 large spaghetti squash
2 T olive oil, divided (that means you aren't going to use it all at once, read the recipe)
4-6 Roma tomatoes, depending on their size. Use your judgement as usual.
a large handful of basil
4-5 chives
about 3/4 cup good quality Parmesan cheese, or more, whatever you want
S&P, to taste

What You Do
1. Preheat your oven to 400 degrees. Now, we gotta slice that squash in half lengthwise and you will quickly realize that it's kind of a mother of a task. FOR THE LOVE OF GOD BE CAREFUL. Use a really sharp large knife (or a meat cleaver, for reals) and GO SLOW and again, BE CAREFUL. Drink your wine AFTER this part. It is *so* easy for the knife to slip. It took me a hot minute to get it done, but eventually I did get into it. (Protip: Don't waste your time with serrated knives. They don't work and you will only wind up with a growing pile of reject knives in the corner of the cutting board at which your roommate will glance suspiciously.)

2. You got it open without stabbing yourself? YAY! It's all gravy from here. Using a spoon, scoop out the seeds and the obviously stringy bits. Brush the squash (the inside parts duh) with about 1 tablespoon of olive oil and add salt and pepper. On a foil-lined baking sheet, turn them cut side DOWN and put them in the oven for 30 minutes.

All nicely brushed, now flip 'em over and into the oven they go.

3. So while that's rockin' and rollin' in the oven, you can dice up your Roma tomatoes, the chives (KEEP CALM AND CHIVE ON!) and basil and add it all to a big bowl with the other tablespoon of olive oil, and a wee bit more salt and pepper if you like. I just let it marinate for about 15 minutes while I waited for the squash to finish cooking.

Obviously I didn't use all of that, I'm just showing off here.

4. After about 30 minutes in the oven your squash should be done. Take it out of the oven and flip it over carefully to check the insides. They should be soft. If not, throw them back in for another 5-10 minutes. But if they're done, let them cool for a few minutes until you can handle them. Turn on the broiler in your oven because it'll take awhile to heat up. You'll want to use a fork to shred out the insides into the awesome little spaghetti-like strings that give this bad boy its name in the first place. So fun! Dump those into the bowl with the tomatoes as you gather it all up.


5. So once that's all combined, you stuff it back into the shells of the squash and top it with Parmesan cheese. Please, do not insult these beautiful vegetables by using that powdered crap. That is not cheese. You can find the good stuff in the specialty cheeses section of any grocery store.

6. Broil for 3-5 minutes or until the cheese gets all nicely browned and melty and smells like heaven. I suppose you could serve this with grilled chicken or something else, but TB and I loved it just as is.

The ONLY thing I would do differently would be to add some crumbled bacon when it comes time to stuff everything back in the shells. I think it really could benefit from that richness, but honestly we were both scraping the shells with glee anyway so I'd say it's a success.

Voila! Serve with a glass of white wine. (Because of course.)

16 August 2013

Lekker: Momma's Roasted Butternut Squash Soup

Hello all, and TGIF! I suppose since it's a Friday I should have a fancy featured cocktail recipe of some sort but I've been sitting on this one for a few days and wanted to share it. I have ALSO been challenged to dream up a Mac-and-Cheese Martini, so that's bouncing around in my head for the future. If YOU have something you want me to attempt, e-mail me at SouthAfricanBokkie@gmail.com--I do love a challenge!

So, let me preface this recipe by saying that it is just slightly more complex than some of my other recipes. It doesn't require any special skills, but it'll take just over an hour to complete and requires two "specialized" tools (if you want to call them that) that aren't reeeeeeally that specialized: a citrus zester (though you might be able to get away with the really really fine holes on a cheese grater) and an immersion blender or a regular blender. If you don't have an immersion blender and you're a regular cook, I highly suggest you get one. KitchenAid I think makes one for like $30 and I've found it to be immensely useful over the years for all sorts of soups, sauces, pestos, etc. But, you can of course use a regular blender for this as well.

This particular recipe is very near and dear to my heart because it is the creation of my dear sweet Mamon. I suppose most memories take on a bit of a rose-hued patina after someone you love dies, but beyond my personal connection with this recipe it's just really GOOD and unique. Many people don't realize what a beautiful soup butternut can make, and most recipes call for a curry taste while this one is so bright and fresh it's almost like springtime. That's why I serve it year-round, really. Wanna give it a shot? Course you do, it's damn delicious.


Roasted Butternut Squash Soup
makes enough for 2 people, IMO
total time: this took me exactly 1 hour and 10 minutes to do, so basically one episode of Orange Is The New Black

What You Need
1 butternut squash, about 2 pounds (or 2 pounds' worth of pre-cut butternut if you can find it...but it's not as good as fresh!)
1 medium onion
Dash or two of white wine
~2 cups of chicken broth or stock
1 orange (normally I give options for lazy people substitutions but not here! This is a must!)
3 T sour cream
vegetable or canola oil
salt & pepper
fresh or dried parsley, to taste

Optional Garnishes: I like a little bit of textural contrast in my soups so I typically top it with a handful of croutons. If you want more creaminess or tang, use a dollop more of sour cream or try crème fraîche. Want a kick? Add a drizzle of sriracha, which looks pretty against the bright yellow too. Or if you really want to be utterly decadent (who doesn't?) you can fry up some bacon or panchetta and top it with THAT. Now that is delicious.

Anyway, 'nough of that. We have to actually MAKE it first before we go garnishing away.

What You Do
1. Preheat your oven to 400 degrees. First thing you have to do is process your butternut into manageable 1-inch chunks and this is the most time consuming part. BE CAREFUL. Use a sharp chef's knife and go slow, cutting it into circles first and then slicing off the skin. (You may want to use a smaller paring knife for that part.) Scoop out the seeds and discard. Chop up into 1-inch pieces and toss with the oil and salt and pepper to get it nicely seasoned. Spread them out evenly on a baking sheet lined with foil and place in the oven for about 10 minutes.

 Look how pretty!

Something like this. My hand slipped on the oil decanter so this is a bit over-oiled; don't do that because I had to use tongs to put the pieces in the pot to avoid everything becoming an oily mess. Pain in the ass.

2. While that's going, heat a tablespoon of oil (or butter if you want for this stage) in a large pot over medium heat. Dice up the onion and fry it up until it gets all...golden and nice smelling. You can add the wine at this stage; any kind will do but I'm usually drinking Sauvignon Blanc and no, I don't measure, I just tip my wineglass over until I think it's enough. If I was pinned against the wall to give a measurement, I guess I'd say 1/4 of a cup? Little more? What do I know, I'm pinned up against a wall and thinking about other things.

Ahem. Moving on.

3. OK so your onion is sizzling nicely on the stove with the wine and if the buzzer has gone off for your butternut it's time to take it out, give it a quick toss and put it back in for another 10 minutes. You want them to roast up nicely without drying out, so just use your judgement. I'll admit that the original recipe called for simply boiling the butternut, but I find that roasting it gives it such a fantastic depth of flavour that I don't think I'll ever boil it again. At this point you can add the chicken stock to the pot and bring it up to a slow boil. Get to work zesting the entire orange (putting the zest aside to add in a second) and juicing it; you'll want to strain it to get rid of the pulp.

 Since you're zesting, find an orange with a really nice, bright orange healthy skin color. Bonus points if you use a South African navel orange!

4. BZZZT. Squash is done, right? Good. Add it to the pot along with the fresh orange juice and orange zest and go to town with that immersion blender. You want it to be really nicely blended with no chunks. If you're opting to use a blender here, you may have to work in smaller batches and just please for the love of God BE CAREFUL, it is a hot mixture and it will go into a glass container that will also immediately become hot. Now that it's all blended it's time to taste. Adjust salt and pepper to your liking and add parsley for color at this stage, too. Feel free to tweak the amount of chicken stock depending on how thick or thin you like your soups. Let it all simmer together for another 5-10 minutes while you toast up some French bread to serve alongside it, or make a salad or drink another glass of wine. If it's all yummy and bright and spring-y, you can take it off the heat now and stir in the sour cream. Serve right away. Bathe in praise and adoration from your dinner guests.

That's it! In my opinion it's totally worth the work and I always get rave reviews when I make this. Hope you do too.

Kisses,
G

14 August 2013

Lekker: Crispity Crunchity Cuke Salad

This isn't a "real" recipe. This is just one of my favourite salads of all time, one I grew up with and learned at my Mom's elbow and was inspired to eat for dinner last night as a way to get more of my delicious homemade feta cheese into my mouth (recipe coming soon).

I was looking forward to this salad all day; it's so crunchy and refreshing and light and just what I wanted after a cathartic run. Also I'm single and busy, so make no mistake I'm not making full fancy meals for myself every night. I grabbed an English cucumber from Trader's Joes and my currently-preferred olive oil (100% cold pressed, 100% organic from Spain and only $5.99 at TJ's) on my way home from work, thinking I'd use the gorgeous vine-ripened tomatoes I'd pick up from the store only a couple of days ago. WRONG! They were, already, a rotten soggy mouldy mess. I don't deal with disappointment well, so I had a beer. Then, PING! I thought to check out in the garden. My housemate TB had told me that our current tomato cycle was over, but I wandered out there anyway and I found more than enough gorgeous, bright red, PERFECT Roma tomatoes waiting to go into my salad.

I know I'm lucky. Not everyone has these luxuries and I'm well aware of my fortune in TB.


Crispity Crunchity Cuke Salad
makes 1 large salad for a really hungry chick

What You Need
1 English cucumber, peeled (it's the long slim one in the plastic wrap in the grocery store; I like it because I think it's crunchier than the traditional cucumbers, but obviously use whatever you like, this is not Nazi Cucumber)
a handful of Roma tomatoes or any other kind you like, in proportion to the amount of cucumber
feta cheese, same in proportion
olive oil
lemon juice (fresh squeezed or bottled, whatever you have)
S&P

What You Do
It's a salad with like 3 ingredients, how complicated do you think this is? Dice up the cucumber and tomatoes into cute little bite sized pieces. Toss it with enough crumbled feta cheese until you're satisfied. Dress it lightly with equal parts olive oil and lemon juice, salt and pepper to taste and stick it in the fridge to marinate for 15 minutes while you drink another beer and pat yourself on the back for making a salad. Nom.

Sometimes, GOOD doesn't have to mean complicated.

You can see I added some diced kalamata olives here because I wanted more salinity since my cheese was much milder than I'm used to. If you're using store-bought feta cheese I would leave the olives out, because that's a LOT of salt, and bloat works for no one.