30 November 2014

Lekker: Lemon Sage Butter Roasted Turkey

Gobble gobble gobble bitches! If I was some fancy cook I would have done this turkey as a test before Thanksgiving, and posted enough in advance so that you, my faithful subjects followers, could make it yourselves for that happy day of gluttony. Alas! I am but a poor and busy girl, so go ahead and bookmark this bad boy for your Christmas festivities or for Turkey Day next year. I'm not just saying that because it's *a* turkey recipe, but because: this is the best roasted turkey I have ever had. (Everyone knows deep fried turkeys are the BEST turkeys.)

LOOK AT IT!

Like no lie, I'm not meaning to boast because any time something of mine turns out so perfectly I'm 98% convinced it's a fluke, but--THIS IS THE BEST AND MOST MOIST DELICIOUS TURKEY EVER! Crispy brown skin, check. Moist, succulent breast meat, check. The kind of gravy I'd kill for, check. Hooolllyyyyyyy shit.

So! Onwards to it then. This is a long-ass recipe because it covers the whole she-bang from the brine to the gravy and everything in between. The brine is a bit tedious and requires advance planning, but the rest of it is quite simple in execution.

First: To brine or not to brine? That is the question. Well, maybe not, but it's a much better question that that other esoteric bullshit.

~Kidding~, kind of, because Hamlet is my favourite Shakespearean work--but I have to believe that if the good ol' Prince of Denmark knew anything about Thanksgiving turkeys he would definitely be asking MY question instead. So, back to it--to brine or not to brine?

There's copious debate about this on the web and equally so among my friends and fellow home cooks. Those who were pro-brining swore by it, and others simply brushed it off with a "Meh, not worth it." Alternatives to the traditional wet brine are a dry brine, a salt crust, or no extra preparation at all save removing the plastic.

This year, since I was cooking Thanksgiving dinner (my first by myself) at my Dad's house which boasts two fridges and the ideal 5 gallon bucket, I figured I would take the opportunity to do a classic wet brine. I'm sure in future years when I'm cooking Thanksgiving dinner in god-knows-what far flung locale I'll be pressed to try these other, more convenient brining methods and indeed, I look forward to it.

Let's get to it cluckers!
Lemon Sage Butter Roasted Turkey
serves 4-6 people
 
What You Need

For the brine:
a 5 gallon bucket or other very large pot, washed out cleanly and dried
1 12-14 pound turkey
(which will feed 4-6 people plus leftovers; I used Butterball)
8 bay leaves
2 T whole peppercorns
2 T dried sage 
1 T dried thyme
1/2 cup brown sugar, packed
1 cup rock salt or other large grain salt (kosher, sea salt, etc.) (if you only have fine grained table salt, you might need to reduce it to just over 3/4 cup)
1/2 cup lemon juice (bottled is fine)
1 can light beer 
1 lemon, quartered
Water

For the roasting:
1 stick (1/2 cup) salted butter of choice, softened (I am batshit crazy about Kerrygold Irish Butter for fancy things like this)
1/4 cup finely chopped fresh sage leaves
2 lemons, zested, and the juice squeezed from only one (strain to avoid any pulp or seeds)
Freshly ground pepper
~2 cups low sodium chicken broth (you'll need to fill up the bottom of the roasting pan to about 1/2 an inch)

Additionally:
1/2 a stick (1/4 cup) salted butter of choice, melted
1 T chopped fresh sage leaves
1 t lemon juice 

For the gravy:
Pan drippings, drained of fat
3 T flour, mixed with a touch of water to create a thick paste
1 cup dry white wine
1 cup low-sodium chicken broth (possibly)
1 cup water

What You Do

To Brine:
1. First you gotta brine, about 24 hours before you plan to roast. In a medium sized pot over medium heat, combine the salt, sugar, spices and lemon juice with enough water to fill almost to the top of your pot. Bring to a low boil and stir until all the salt and sugar is dissolved. Remove from heat and let cool.

2. In the meantime take your turkey out of the fridge, unwrap it in the sink, and remove the neck and giblets and whatever other weird body parts they've stuffed inside there. You can do whatever you want with those since I won't be using them. Rinse the turkey with cold water inside and out, and plop it into your makeshift poultry hot tub.

3. Pour your dissolved mixture over the turkey, along with a can of beer and the lemon quarters, and then fill the bucket the rest of the way with plain water until the turkey is just covered and stir. You may need to weight it down with something to make sure it stays immersed; I found that if I just sort of jammed it in there properly it stuck.

4. Stick that monstrosity in the fridge to chill out for about 24 hours, or until about an hour before you need to roast.

To Roast:
1. Hooray, it's T-Day! Time to get going. About an hour before you need to stick the turkey in the oven (check the packaging directions to find out how long your turkey will need to cook; I had a 13.45 pound turkey and it took about 3 hours and 20 minutes) remove it from the brine and place it on your roasting rack set inside a roasting pan. Pick off any solids like bay leaves and peppercorns and such and throw the brine down the drain. Allow the bird to come to room temperature for about an hour. Chill the hell out about bacteria and whatnot, it'll be fine.

2. Preheat your oven to 450 degrees F. In a small bowl, mash together the butter, lemon zest, lemon juice, sage, and freshly ground pepper. Now here you have to do something kinda gross/mostly cool: run your hands underneath the turkey skin on top to separate it from the breasts. There's a thin sort of membrane that attaches the skin to the flesh and you'll feel it give way as you separate it.

3. Take half the butter mixture in your fingers and insert it in between the skin and the breasts you just separated, rubbing and smoothing it out until the breasts are well covered. ***This is sounding HIGHLY suggestive at this point, because tbh if anyone were to rub something on me...chances are, I'd pick Kerrygold Irish Butter over chocolate syrup any day, but at any rate...*** Rub the other half of the butter mixture all over the outside of the turkey, in all the crevices like the wings corners and drumsticks.

Like so.

That's my Maple Bourbon Pumpkin Cake chilling behind me, and a mimosa in my hand because it isn't a holiday unless it's started with some bubbly!

4. Woo! All done and time to go in the oven. Last thing you have to do is pour in about 2 cups of chicken stock or broth into the pan so that the drippings won't burn during roasting. Toss that bird (we named ours Dorothy because I'm macabre and weird) into the oven at 450 for only 15 minutes. This blast of heat allows the skin to get a jump start on browning. After 15 minutes, turn the heat down to 350 degrees and set the timer for 1 hour.

5. Melt the additional 1/2 stick of butter and mix with the extra sage and lemon juice. After the timer goes off, remove turkey from oven and baste with pan juices and some of the melted butter mixture. Replace back into the oven, and repeat two more times until turkey registers 160 degrees F when a meat thermometer is inserted into the thigh, or about 2-ish more hours. If you find that the breast is browning too much (at around hour 2 for me) you may gently cover it with a bit of foil.

The last baste...look at all that yummy sage and lemon zest! And those pan juices are destined to make a bomb ass gravy.

To Grave (.......I went with it)
1. Once the turkey is done, remove it to a plate or carving board to relax for about 20 minutes to let the juices disperse throughout. Cover with foil to keep warm. Toss the roasting rack into the sink, and pour off the majority of the fat from the bottom of the pan into a separate heat-safe dish. That should leave you with just the delicious drippings in the pan. At this point, you have the option of cooking the gravy directly in the pan set over two burners; or if you used a nonstick pan like I did, you can just pour all the drippings into another more manageable smaller pot. However if you did NOT use a nonstick pan I DO NOT RECOMMEND THAT! All those browned bits stuck to the bottom are flavour bombs, and you'll want to include them in your gravy.

2. At any rate, bring the drippings to a rapid simmer and whisk in the flour. Whisk constantly and cook for about 4 minutes to thoroughly cook out all the raw flour taste. The gravy should thicken considerably at this point. Then add the wine, and cook for about 8 minutes, whisking often, until most of the alcohol has burned off. Whisk in the water, and TASTE! The salt level at this stage is important. All that salty butter and chicken broth may have provided more than enough salt for your tastes. If the salt level is good, do not add chicken broth and instead simply add more water until your gravy reaches the desired consistency.

Serve over your carved turkey, and I'm sure you will have a very happy table! Bon Appetit!

Lekker: Maple Bourbon Pumpkin Cake

My last blog post was about the amazingly simple Salted Butter Apple Galette, which I love because it's an alternative to pie, because I don't like pie SO SUE ME. For Thanksgiving dessert this year, then, I opted to make this Maple Bourbon Pumpkin Cake. I picked this because bourbon, and because I didn't want a painfully sweet saccharine dessert. This strikes the perfect balance between sweet (the glaze and the maple candied pecans) and boozy-spiced-fall-ness, and was a hit at my table. (Especially when served with vanilla ice cream.)

 
I like to envision this method of decorating as all the pecans coming to worship at the pecan Altar of Candied Wonder in the middle.

It doesn't really matter which bourbon you decide to use. Maker's Mark is my do-or-die favourite, but I am poor now and cannot afford that so I was good ol' Jack for me. Most of it bakes off though, so honestly it doesn't make any difference.


So, let's get baking!

Maple Bourbon Pumpkin Cake 
serves 8
 
What You Need

For the cake:
2 3/4 cups all purpose flour
1 T baking powder
1 t pumpkin pie spice
3/4 t salt
1 1/2 cups firmly packed dark brown sugar
1/3 cup unsalted butter, room temperature
2 eggs
1 t vanilla extract
1 cup cooked pumpkin (Use the tinned stuff like I did, since I had leftovers from making one of my all-time favourite soups, this Pumpkin Soup)
3/4 cup whole milk
1/3 cup bourbon of your choice

For the glaze:
2 cups confectioner's sugar, sifted after measuring
2 T half-and-half
1 T melted unsalted butter
1 1/2 T bourbon
1 t vanilla extract

For the maple glazed pecans:
Shocking that you would need pecans and maple syrup, right?
1/2 cup pecan halves
2 T pure maple syrup
1/2 t cinnamon

What You Do
1.  First things first, in a small bowl mix together the pecans, maple syrup, and cinnamon really well. These babies are gonna soak in that goodness while you're mixing up the cake. Give it a stir every once in awhile to make sure the syrup gets into allllll the nooks & crannies.

2. Preheat your oven to 350 degrees F and grease two 8-inch round cake pans. (I suppose this cake could also be done in a Bundt pan or some other loaf pan, or as cupcakes, but I don't know the cooking times and what have you for that.)  In a medium sized mixing bowl, whisk together the flour, baking powder, pumpkin pie spice and salt. Whisk it well, since I'm saving you the hassle of actually sifting that flour separately to aerate it!

3. In another larger mixing bowl, beat the butter with an electric mixer until light yellow and fluffy. Add the brown sugar, and beat again until light and fluffy. Add the eggs and mix well. See: light and fluffy. (Get the picture?) Then add your pumpkin and vanilla. It might look a little grainy and weird after you add the pumpkin, but don't try to overbeat it just to get rid of that. It's fine.

4. With your mixer on low, add half the flour mixture to the wet batter. Mix well. Add the milk, and mix well. Add the other half of the flour, and ___ ____. Finally, dump in the bourbon and mix shittily and lazily well-ish.

5. Pour the batter evenly into your pans, and bake at 350 for about 20-ish minutes or until a toothpick inserted in the center comes out clean. Remove the pans and set on top of wire cooling racks for about 10 minutes (this gives the cake time to contract from the sides of the pan) and then flip out onto the racks to finish cooling.

6. *While* those babies are cooling, and your oven is still at 350, it's time to do the pecans! Line a baking sheet with parchment paper, and dump your maple coated pecans on there. Bake for 5 minutes, then remove and toss, and bake for 5 minutes more. That's all it should take for them to go all nicely dark brown and smell amazing. Feel free to taste test one.

7. Since that only took 10 minutes and your cakes are probably still cooling, you can mix up your glaze now and give it time to set up. Tangent: I have a love-hate relationship with glazes. They are easy because they literally involve just dumping everything together and stirring until smooth (so...do that), BUT. Since glazes have a more liquid consistency that frosting, you kind of just dribble it down over the top of the cake and hope that it will come dripping down the sides attractively. But if you want those attractive little drips, then you can't pour too much glaze on...WHICH MEANS THERE ISN'T ENOUGH GLAZEY GOODNESS ON THE DAMN CAKE! And I won't stand for that. So what you should do is schmear a decent amount on the inside of your two 8-inch layers as a filling, and *then* content yourself with dribbling the glaze over the top. If you want to put something else or nothing at all in the middle, then here's what I suggest: do one layer of slow glaze dribbling. Stop. Leave it alone for about 15 minutes, giving it time to set up. Then come back and do a second layer. It still won't give you a ton of glaze on the sides, but there's more on the top and whatever, I suppose that works.

8. I honestly don't even remember where we were now. Oh right, okay so you made the glaze. Once the cakes are cool, stack them on a cake plate and glaze accordingly as discussed/ranted about above. Decorate with the pecans as you wish. Done!

It would have been nice if I had remembered to take a photo of the *inside* once we had cut a slice, but no. Of course not. FOR THE RECORD, though, it's a lovely dusty dark orange.

Recipe originally inspired by this one by Bakerella.

27 November 2014

Lekker: Salted Butter Apple Galette

It's here, it's here, it's finally here!!! Happy Thanksgiving guys!

I can't wait to share with you some of the things I'm making for today, after they are taste tested by my highly qualified tasting panel (hah). On the menu is a Lemon Sage Butter Roasted Turkey with white wine gravy; my classic Perfect Mashed Potatoes; Sourdough, Italian Sausage and Roasted Chestnut Stuffing; and a luxury Green Bean & Mushroom Casserole. I'm not a fan of dessert pies, generally, and so for dessert I opted for a Maple Bourbon Pumpkin Cake.

If you find it utterly sacrilegious not to serve apple pie for Thanksgiving dessert though, may I propose this utterly delicious and simple Salted Butter Apple Galette as an updated alternative? Isn't it beautiful?! And so deceptively simple, too. The ingredient list is short, and you just might already have everything you need around the house just in *case* one of your preplanned desserts doesn't entirely work out. ;)

This recipe is straight from the hallowed halls of Bon Appetit Magazine, with whom I enjoy the most majestic of love affairs, so I'm just going to link to it right here. The only changes I made were to use a teaspoon of vanilla extract instead of bothering with vanilla beans. Don't be intimidated by the apple slices! If you have a mandolin of course you can use one, but I just sliced neatly with a steady hand. The tart dough is easy to whip up too, just make sure you have some time for it to chill in the fridge. Onward!
    

Ah, look! Proof, that I do, actually, do all this cooking! And yes, I am using an empty wine bottle as a rolling pin, because why not?


It should look like this right before you pop it into the oven. Num num num,

And...fin!

26 November 2014

Lekker: Vegan Sweet Potato & Black Bean Chili

Hello there, and Happy Thanksgiving pals!

As a foodie, I'm sure you can imagine that this is very nearly my favourite holiday of the year. Christmas is my actual favourite, but only because it's LONGER. Because Turkey Day is just one day I feel like Thanksgiving never really gets its proper due, so when I grow up, I plan to host quarterly Thanksgiving dinners at my house. There's just too many cool recipes I want to try, with only one chance per year! Bollocks, in my opinion. (That plan hinges on the obviously faulty logic that I will, in fact, one day grow up--but nevermind.) 

Surprising to no one I've been planning my Thanksgiving menu since sometime in September, and I ultimately decided that sweet potatoes were axed from this year's menu. Since it's just my Dad, my 20-year-old body building brother Champ and I for dinner this year it's quite the small party and thus I had to be painfully limited with my side dishes. Champ, of course, threw a hissy fit when he found out I wasn't doing a sweet potatoes because of course he doesn't care about anything ever but the **second** I say no to something it's immediately the most important thing ever ever ever--but I'M IN CHARGE HERE DAMMIT!

To yield to the sweet-potato-based pressure, I cooked up this vegan sweet potato and black bean chili for dinner. None of us are vegans here, I assure you, this is completely by chance--but it's so lean, filling, and chock full of wholesome things, it's something to feel good about eating before you dive in face first unapologetically into the gluttony and gravy-induced stupor that is Thanksgiving.

Chili never looks particularly appetizing, but damn if it isn't delicious. And yes, my father ruined the "vegan" aspect by topping it with a mountain of shredded cheddar cheese.

Vegan Sweet Potato Black Bean Chili
serves 4

What You Need:
1 very large, 2 medium, or 3 smallish sweet potatoes, peeled and diced into a small dice
1 teaspoon paprika
1/2 teaspoon salt
Freshly ground pepper
2 tablespoons olive oil, divided
1 red or green bell pepper, diced
1 medium onion, diced
4 cloves garlic, diced
1 green jalapeno, seeds removed and flesh diced
1 teaspoon ground cumin
1/2 teaspoon oregano
 3 1/2 cups cooked black beans (that equals 2 15-oz tins, or see my note below if you want to try cooking them from scratch)
4 teaspoons adobo sauce from a tin of chipotle peppers in adobo sauce (if you like your chili more on the spicy side, feel free to add in one of the chipotle peppers, chopped)
1 28-oz tin diced tomatoes with their juice
1 teaspoon white granulated sugar
1 teaspoon unsweetened cocoa powder
1 cup water or vegetable broth, to thin it out

Optional, To Screw Up The Whole Vegan Thing: Sour cream or shredded cheese, to serve

***On black beans from scratch:***
My Mother, God rest her soul, was born and raised in Guatemala on the traditional staple diet of black beans and rice. Do you think they use tinned beans down there? LOL, no. That's an American convenience, but after cooking my own beans from scratch this weekend I understand WHY it's such a convenience. Holy shit, cooking dry beans from scratch takes forever. Now, research on the great wide Internet tells me the age of the beans has a lot to do with the cooking time and I'm not kidding when I say that because I dug this particular batch of beans up from the back of my Dad's pantry, I am therefore estimating their age at AT LEAST 6 years old. But, cooking the beans is not that hard, just time consuming: In order to yield about 3 1/2 cups of cooked beans, I used just about 1 1/4 cup of dry beans. I rinsed them under running water in a sieve, and then soaked them in cold water overnight. The next day I drained the water and tossed them in a small pot, covered with water, added 1 teaspoon of salt, and let them simmer merrily away...for SIX HOURS. Six hours! I had to top off the water a couple of times to make sure the beans stayed properly covered, and stir a few times, but that's about it.

So, is it a hassle to make your own beans from scratch? Yes, I think so, because it requires advanced planning and more effort. That said, I would do it again in a heartbeat. Why? Because as the beans cook they release starch and flavouring into the cooking water, yielding this black salty broth that acted as my liquid in the chili recipe, and tastes AMAZING. Like I could sip that from a mug all day in bliss. These are the beans I remember from my childhood, and if you did a taste test of beans from scratch next to tinned beans, I absolutely guarantee without a doubt that the beans from scratch will come out on top, every time.

That's it for my rant on beans for now, but I'm planning on writing a whole separate blog post on them shortly about how to select and cook them, store them, and freeze them--and more importantly, why you should definitely, positively, should be putting them in and around your mouth.

What You Do:
1. Preheat your oven to 400 degrees F and line a baking sheet with foil. On it, toss together your diced sweet potatoes, paprika, salt and pepper to taste with only 1 tablespoon of the olive oil and spread out into a thin layer. Roast for 25 minutes, stirring once in between. Remove from the oven and set...somewhere. Aside. Out of your way.

Roasted sweet potato is the best sweet potato and there will be no debate on that fact.

2. In a large pot over medium heat, heat your olive oil and saute up your onion, bell pepper, garlic, jalapeno, cumin, and oregano until everything is nice and soft. Add in the black beans, the tin of tomatoes, adobo sauce, sugar, and cocoa powder. Stir. (Note: at this point, I added 1 cup of the black bean broth because the chili was too thick to simmer properly. If you opted for tinned beans, add in a cup of water or vegetable broth here.)

3. Bring the mixture to a simmer, then reduce heat to low and let it simmer merrily away for about 30 minutes, stirring occasionally. Then add in your sweet potato. Simmer for another 15 minutes-ish or until all heated through nicely.

Dunzo!

There are zillions of chili toppings, of course, but in my house we dig shredded cheddar cheese and saltine crackahs. Cheese is obviously not vegan, but there are vegan cheese options so if you're that into it, by all means, have at it.

19 November 2014

Lagniappe: TEDTalks Jamie Oliver "Teach Every Child About Food"

Seems like such a simple idea, doesn't it? Teaching kids about food? I mean, we spend plenty of hours teaching them practically useless bullshit in school like algebra and geometry--surely we'd wile away at least a few hours teaching them how to put food in their face holes, right?

Right?

False, brosef. And it's the most disappointing thing in America, and that includes Kim Kardashian.

(And before any of you nerds get all fired up about algebra and geometry, I challenge you to give me examples in the comments of when, as a NORMAL FUNCTIONING ADULT, you have used algebra/geometry three times a day *every* day in your life. No? OK so yes, food education is more important.)

How can we expect anyone to eat right if they don't know their ass-end from a rutabaga? How can we explain to an insecure crash-dieting teenager girl that she doesn't need to do all that crap to be slim--all she has to do is eat some damn chicken--or beans, or fish, or other high protein food combined with a fibruous vegetable on the side...?

It's not rocket science and it's (clearly) a subject I feel passionately about. Jamie Oliver does, too. The next time you're making one of my yummy recipes, because of course you are, prop up your laptop or iPad or whatever and hit play on his great TED talk, below.


Everyone's a critic, though, and I get that too. "Jamie Oliver has millions of dollars and a bunch of assistants, of COURSE he has the time and resources to feed his kids properly." I hear you. I can also recognise that I am a young single kidless person. Granted, I have no money, but you'll notice I'm not spending my meager funds on garbage food. Who knows, maybe when I spawn I'll be stuffing my kids with all the same fried poison--but I doubt it.

Why? Because I know better. Because I taught myself. Because no one else did, and certainly not in school. Jamie Oliver is trying to change that, and I applaud and support his efforts. Knowledge is power. I hope that I can do the same, even if it's on the tiniest scale, even if it's just one recipe from this silly little blog that someone decides to cook instead of tossing some frozen chicken nuglets in the oven or whatever.

And you know what dudes! The stuff I post isn't crazy stuff. That's my whole credo, for crying out loud. Good food (and when we say "good" I mean both good-tasting and good-FOR-YOU) doesn't have to be expensive, or complicated. As cheesy (hah) as it is, sometimes the best things in life are the simplest.

Last thing I will say on the subject: life is about balance. So is eating. You're not going to do permanent damage to your body if you have a McDonald's double cheeseburger every ONCE in a while. It's the day-to-day decisions we make that make all the difference.

Take a look at that video, friends, and pass it on. Let's all make a commitment to changing the way WE eat, and then serve as examples for the next generation.

1 November 2014

Lekker: Cheesy Polenta & Collard Greens

Ey yo! Long time no see! Being back on that college grind means my entire diet has basically been whittled down to the "cheap and healthy" category of 1) salad and 2) eggs on toast.

That's it.

When I go home and visit my Dad on the weekends, I get crazy and eat some chicken, and drink a beer. It is like a madhouse up in here, y'all.


HOWEVER, this weekend I got the inordinate thrill of actually--gasp--COOKING A MEAL. And it was grand, because I discovered the joys of polenta a few months ago and it is absolutely my new favourite comfort food. In my highly unhumble opinion it's pretty much on par with mashed potatoes when done right, and I think it's the cheesiness that does it. Polenta is historically a peasant's dish from back in Ye Olde Long Ass Time Ago (around the 16th century to be precise but honestly anything before like 1985 is just lumped together), because it's just cornmeal boiled with water into porridge. Gruel. Yeah that's right. I'm teaching you how to make gruel, you filthy Roman slave. 

For the rest of this post, you may envision me this way. Triple bonus points if you actually know who this is. 

Anyway, back on track. A quirk of polenta is that is has a very short "plate life", just FYI. It can sort of gum up fairly quickly, so if you're adding it to part of another meal you want to make sure you've got everything else ready to go before the polenta is finished. It also doesn't reheat really well so don't make more than you need, BUT if you do, next-day polenta can be cut into pieces and either fried or grilled and is REALLY delicious.

Don't be put off by that. Don't be lazy. 

Oh, and one last thing--since polenta is a starch you can pair it with just about anything your heart desires, but I was craving a Southern feel (and bacon was on sale, because there is a God) so I went ahead and mixed up a batch of my Bacon Braised Collard Greens to put on top. And then, of course, a crown of poached egg at the summit of this deliciousness, because if it CAN be topped with an egg, I will do it.

Cheesy Polenta
serves about 4 Roman slaves, if they are skinny, or 2 Roman Slave Lords if you want a bit of leftovers

What You Need
3/4 cup fine yellow cornmeal
2 cups chicken broth
1 cup white wine (not a sweet one like Moscato or Reisling)
3/4 cup grated sharp white cheddar (Cabot is the shit. Like, bar none best cheddar you can find at the grocery store)
1/2 teaspoon paprika
fresh cracked pepper

What You Do
1. It's really easy. In a medium saucepan over medium heat, bring the broth and wine to a rapid simmer. Slowly sprinkle in the cornmeal, paprika, and a bit of pepper, whisking constantly to avoid any lumps. It'll thicken up immediately and look like bubbling lava. Yummy! Turn the heat down to low, cover, and simmer gently for 15 minutes, stirring often.

2. It should only take about 15 minutes to cook, so at this point stir in the cheese until it's nice and melty. The consistency should be smooth with no lumps. If it's looking too thick for you after the cheese has been added, stir in a little more broth or water to thin it out (I like mine thinner), and serve immediately. 

If you like, you can add some chopped fresh parsley or chives for some pretty colour; I just didn't have any. This recipe is bound to pop up again because there's so many variations I want to try, like...a baked chorizo, egg and polenta breakfast skillet...coming soon! (ish)

21 July 2014

Lekker: Stuffed Portobello Mushrooms

So my Dad's been on a bit of a mushroom kick lately and every weekend I come home, he buys a pair of portobello mushroom caps for us to have. Please don't ask me to explain any further because I really don't know.

Anyway, last night I realised we had some spinach in the fridge that needed using and stuffed mushrooms became pretty obvious. Grievously, I forgot how much mushrooms shrink when they cook, so with one mushroom a piece (even topped with a poached egg for some filling protein) we were a bit underfed. So to that end, I suggest you employ these as a side dish to chicken or steak; or double the portion per person to serve as a full dinner with a salad on the side; or perhaps for brunch as well. No matter what though, it's easy, fast, and delicious!

See? OK, the mushroom shrinks quite a bit so...yeah...I promise it's there and it's yummy. The molten egg yolk creates a rich sauce that pulls everything together. Oh, and? I recognise this is a crappy Instagram picture. The photography struggle in my Dad's kitchen with flickering fluorescent lights is REAL, I tell you.

Stuffed Portobello Mushrooms
serves 2 as a side dish; or double to create a proper meal for brunch or lunch with a salad

What You Need
2 portobello mushroom caps
1 very large handful fresh baby spinach, chopped finely
1 Roma tomato, seeded and finely diced
About 1/2 cup breadcrumbs (We didn't have any pre-made panko breadcrumbs in the house so I just made my own using a piece of whole wheat bread grated on a box grater. Spread it out on a pan lined with aluminum foil--you'll reuse the same one to bake the mushrooms so you're not dirtying another dish--and spray with cooking oil of your choice. Bake at 375 for about 4 minutes and they'll be crispy and good to go.)
1/2 cup of grated cheese of your choice (I used grated extra sharp cheddar since that's what we had but feta, Parmesan, or any other hard cheese would be great here.)
1/4 teaspoon dried oregano
S & P, to taste
1/2 teaspoon olive oil, maybe

Optional: two eggs, poached, to top

What You Do
1. Preheat your oven to 375. As with all mushrooms, first wipe them down with a damp paper towel to get off any excess dirt. Then, using a spoon, gently scrape out the dark gills on the underside. I've never been formally told to do this, but they REALLY freak me out and don't look delicious at all, and I know other people do it, so--follow the crowd. Do it. Also creates a deeper bowl to stuff more delicious things in.


2. In a small mixing bowl, combine the spinach, tomato, breadcrumbs, cheese, oregano, and salt and pepper. If it looks very dry and isn't bonding well, add a bit of olive oil to bond it all together.

3. On a small baking sheet lined with foil, lay your mushroom caps upside down. Spoon the mixture into the cavity until it's well heaped.

4. Bake for 10 minutes, and then turn on your broiler and broil for about 2-3 minutes to get the breadcrumbs right on the top nice and crispy.

You can be busy poaching your eggs while the mushrooms are baking, if you opt to serve them that way, which you should, because I said so. I can't WAIT to make these for brunch this weekend, perfect alongside a mimosa or seven.

17 July 2014

Lekker: Guatemalan Black Beans

KNOCKKNOCK...knock.

Hi.

Why, and how, on EARTH--did I think I would have more free time in college than I did working a 9-5 job? I know nothing. Not about time management, and certainly not about calculus either. Sigh.

With a grocery budget down to $40 a week, all I've been eating for the last few months is Greek salads, eggs on toast, tuna (from a can, of course) and the perennial tinned food of Le Cheap People: beans. Beans on toast is a traditional last-resort dinner for college students (and other broke people) in the UK, but having grown up with a Guatemalan-born mother, I go a slightly different direction with these easy, protein-packed Guatemalan black beans.

If you're not too worried about carbs, serve these over some cooked rice (brown rice for maximum nutritional value, of course, that white stuff is just nonsense) or with some tortillas to sop it all up. Since we all know protein is the thing that keeps us fuller for longer, and thus eating less (you DO know that right???) I like to top these with a poached or fried egg with a dab of hot sauce drizzle.

Oh, and don't cry for me and my budget too much, Argentina--with such lean, light foods I'm down 8 pounds. YAAAASUH!


 It might not be pretty (bean dishes rarely are) but to me, it's the perfect filling comfort food.

Guatemalan Black Beans
This serves, like, one and a half. Enough for dinner and some leftovers.

What You Need
1 tin black beans (Goya brand preferred) rinsed and drained
1 tin diced tomatoes
1/2 a large yellow onion, diced
1 clove garlic, minced
Handful of fresh cilantro, roughly chopped
Preferred oil for frying
1/2 teaspoon ground cumin 
1/4 teaspoon or less crushed red pepper flakes, just for a little kick

Seriously, that's it!

What You Do
1. This is so simple. In a medium sized saucepot, fry up the onion until it's soft and golden brown. Throw in the minced garlic for the last minute and stir, just until it's nice and fragrant. Add the beans and the tomatoes (with their juice) and stir to combine. Add the cumin and crushed red pepper flakes, stir, and simmer for about 20 minutes. It'll look a little dry at first, but as it cooks the beans and the tomatoes will release more moisture.

2. For the last 2-3 minutes, toss in the cilantro. When it gets overcooked it looks gross.

3. Optional: top with a poached or fried egg with or without hot sauce, or with rice, or tortillas. Nom nom nom. 

14 May 2014

Lekker: Warm Roasted Kale, Broccolini & Chickpea Salad with Burrata

Hello hello! Last night I got back into the kitchen after almost a month away from recipe testing and let me tell you, it is SO GOOD FOR MY SOUL. I exclaimed to my friend Baer that there is absolutely no doubt that this is my passion in life. Cooking brings me so much joy, relaxes me, challenges me, and is the best never-ending entertainment. How fortunate that I picked a passion that is so easily practiced!

On to dinner, then. Everyone in the food world is "over" kale now, though whether it's because it's become too mainstream (cue my "snobby hipster bullshit" alarm) or just because we all got over-saturated with it for awhile I can't be sure. Personally I can't be bothered with trends (I am still wearing distressed denim and ask me if I care) so *I* still love roasted kale like mad, though, and since the broccolini was looking so utterly bright green and wonderful in the shop I decided to toss this salad together. It takes about 10 minutes, tops, and manages to be warm, filling, crunchy and creamy all at the same time.


Warm Roasted Kale, Broccolini & Chickpea Salad with Burrata
serves 2

What You Need
1 bunch fresh kale torn into large pieces (It looked so hardy and good in the store that I decided to work from fresh instead of using the usual pre-washed bagged stuff as I usually do. I think this helped control some of the possible bitterness in kale, and come on, it's idiot proof to rinse the leaves and tear them into large pieces. Remember that kale, like spinach, cooks down tremendously so err on the side of more rather than less when estimating raw kale.)
8 ounces (about one small bunch) broccolini (In case you don't know, broccolini is like baby broccoli. It has longer, more tender stems and larger buds on the "tree tops." I prefer it over regular broccoli for roasting, hands down. Trader Joe's carries it, though you can often find it at farmer's markets, organic food stores, gourmet markets, Wegman's, Publix, etc. as well.)
1 tin chickpeas (aka garbanzo beans, same thing) rinsed and drained
salt & pepper
red pepper flakes or chili powder, to taste (I probably used about a teaspoon of chili powder, maybe a tad more)
olive oil for roasting
juice of about 1 lemon
4 ounces burrata cheese, roughly sliced (Burrata is a type of mozzarella, but instead of being simply a solid ball of mozzarella it's got this delicious creamy center. It's oozy and rich and melts ever-so-slightly on top of the salad to give you the "necessary" richness for such a *healthy* salad!)

What You Do
1. Heat your broiler on high. In a large bowl, toss together the broccolini, torn kale, chickpeas, salt, pepper, and either red pepper flakes or chili powder with a bit of olive oil until just coated. Spread out onto a baking sheet (you might need to use two; don't crowd the pan too much otherwise things won't roast properly) and broil for 6 minutes, tossing once at the 3 minute mark.
 
 Like dis.

2. It'll be done when the kale is just turning brown in spots and the broccolini is bright green. Squeeze the fresh lemon juice over all and top with the sliced burrata. Serve warm.

10 May 2014

Lagniappe: I'm Back!

Well, kinda.

Hi all! Do you all remember me? Sorry for the long lapse in posting, but I do have a very, very good reason, namely, that over the last month I quit my job of three years, packed up my stuff and moved 1000 miles away from DC back to central Florida to go back to college at the University of Florida. April was filled with case finalisations at work, endless packing, pantry clean-outs, and many many going away parties--the last of which was epically thrown by my incredible friends and fellow Chivers that wound up raising $1000 for a charity very near and dear to my heart, the Hanne Howard Fund.

Yes, that's me, front and center. With the crown. Don't act like you're in any way surprised.

Being back in Florida and starting this new chapter of my life is a good thing, but I'm not sure yet what that means for this blog. My Dad is a very active, athletic individual who tries to eat very clean and lean, so de facto when I'm with him I'm somewhat restricted in what I can cook. We eat a lot of salads. Like, A LOT. So I think you can expect more "healthy eating" entries here, though I promise I won't be doing salads 24/7 because even I get bored of that pretty easily.

Another caveat is that I'm a college student now, so, there's that money thing...in that I DON'T HAVE IT. I'm being forced to trim my grocery budget to about half of what it used to be (*sob*) so I'm challenging myself to be more creative with less. No more short ribs at $14 a pound for awhile. I'm also cooking out of a tiny student kitchen I share with two other roommates with limited supplies which is even more entertainingly challenging.

If you think the cocktailing is going anywhere though, you're mad. I may be a college student (and yes, I've already enjoyed wine out of a box--DON'T HATE) but that doesn't mean I'm resigning myself to guzzling bathtub gin jungle juice only!

I have a few entries in draft that I'll work on getting up soon as I work on getting settled and established in this new life. Until then, eat and drink well my friends.

1 April 2014

Liquor: The Classic Gin Martini

My tastes tend to skew towards savory rather than sweet (how many dessert recipes have you seen here?) but lately that's been refined very specifically to acidic tastes: pickles, mustard, vinegars, and olives. Olives, olives, OLIVES! Right now I think I have about six different jars sitting in my fridge because I'm obsessed with trying everything new and delicious and wonderful that I can get my hands on. The only ones I haven't liked so far are the bleu cheese stuffed ones, which was a terrible disappointment to my cheese loving soul. However, those ones sit in a juice that is thick and syrupy, almost slimy, and I don't know if it's because of the cheese or what, but it's gross, and you should keep it the hell away from me and my martini.

Martini! Yes, truly my FAVOURITE way to enjoy some olives. What's that? You already know how to make a classic martini? 

 Yes, I did just make that specifically for this purpose. I am Batman.

Usually you know I let you guys do whateverthehell you want, but on this I say no. Vodka martinis are great, and popular, and this and that and the other thing, but a traditional martini is made with gin and I will not hear another damn thing about it.

NOW, there is considerable debate as to whether a martini should be shaken or stirred. A traditional gin martini should be stirred, not shaken, as according to my research shaking can "bruise the gin". I don't know about this. My gin has never complained and if it does, well, it had it coming, amirite?  But after all my caterwauling about traditional and "classic" this and that, I have to say I like my martinis absolutely ice cold and that just can't be accomplished by stirring.

ALSO it's how James Bond orders his martinis and if you can't take advice from James Bond then I guess we're all screwed. I read somewhere once a theory that James Bond was so sophisticated that he would have known that stirring is the more common way to serve a gin martini, but that in his wisdom of being a spy and being in charge of poisons, guns, motor vehicles, etc, he always limited himself to one martini, and had it shaken so that more of the ice would melt, thus diluting the drink a bit more. This logic makes complete sense to me and lines up pretty well with what we see in the movies. He also drank vodka martinis, which are ALWAYS served shaken, not stirred, so maybe the dude just got confused. Whatever.

Besides, how else do you expect him to close the deal with [insert Bond girl here] if he has more than one drink? 

It's unfortunate that I don't own proper martini glasses, as the stem is necessary to keep the drink cold as we discussed in Boozing on a Budget. It's also regrettable that I wound up with small ice slivers in this martini. What can I say, my strainer was in the dishwasher!

Classic Gin Martini
makes 1, preferably for James Bond

What You Need
2.5 ounces gin (We are led to believe in 1953's Casino Royale that Bond drinks Gordon's gin. I used my current experimental favourite, Plymouth, because I am not fancy enough to have two bottles of gin in my house at once.)
0.5 ounces dry white vermouth (Martini & Rossi is the most famous and widely used brand) 
1 or 3 olives, to garnish. That's obviously what started this whole blog post, but a classic martini can also be served with a twist of lemon peel instead. Why either one or three? Because two just looks weird and too symmetrical, and even numbered olives in a martini is supposed to be bad luck.

What You Do
1. Combine the gin and vermouth in a cocktail shaker over lots of ice and shake for 30 seconds.

2. Strain (double strain with a second strainer to catch any ice shards that might be left) into a martini glass and serve with three olives.

If you want to try your hand at making a a proper classic gin martini, instead of shaking in the shaker simply stir gently with a wooden spoon until combined and proceed to step 2. By all means have at it, but if James Bond can break tradition and enjoy an ice cold martini then so can I.

If I am feeling extra debaucherous (possibly not a word) I like to make it a dirty martini by adding half an ounce of olive juice, right from the jar to the gin and vermouth before you shake. Enjoy, you dirty little birds!

PS. I am OBVIOUSLY KIDDING about the gin joke, you can put your pitchforks down.

28 March 2014

Liquor: Grapefruit Rosemary Diamond Fizz

IIIIIIIIII have just discovered my new favourite morning drink! This is the MOST fun, because I think mimosas and Bloody Marys, while awesome, are totally played out. I get bored easily. When you're hosting a nice fancy brunch, you want to be able to offer something unique!

Alternatively this drink is classy and snazzy enough for an elegant evening dinner, perhaps with fish or a salad since it involves a light, dry prosecco. That's why it's called a diamond fizz instead of a regular gin fizz--prosecco/champagne trumps regular club soda or tonic water here. Cuz we fancy. Fancy doesn't have to cost an arm and a leg, though--I picked up a bottle of Penny Stamp Prosecco at my local World Market for $7. When it costs less than a bottle of wine, you don't have to wait for a special occasion to break out the bubbles. A Thursday will do. Thursdays are great. Thursdays are Friday Eve, the pre-weekend. DO IT!

Oh! And I have to share this COOLEST OF COOL gadget I also found at World Market, the Rabbit Champagne Sealer. This little doo-dad expands to fit champagne and wine bottles of pretty much any size so that it doesn't go flat in the fridge until your next opportunity to drink. And it really works! How cool is that!

I am such a simple child.

I've gotten so used to using garnishes on drinks as an accompaniment, but champagne based drinks really don't require it and the shape of the glass doesn't reeeeeally lend itself to such. So it doesn't LOOK terribly fancy, and my photography sucks, but trust me--it's light, bubbly, delicious, and not too sweet.

What You Need
makes 1 bubbly cocktail

1 tablespoon of our previously made rosemary simple syrup
2 ounces fresh squeezed grapefruit juice (I had some tucked away from my most recent batch of Grapefruit Crushes)
1 ounce gin
Champagne or Prosecco, to top off

What You Do
1. In a cocktail shaker filled with ice, shake the rosemary simple syrup, grapefruit juice, and gin together for 30 seconds until the mixer is frosty. Pour into a champagne flute and top off with prosecco or champagne.


26 March 2014

Liquor: Cucumber Mint Gin

Back again with the booze! Yeeeaaahhhhh....I've been drinking my dinner most nights this week but also, ALSO! I'm moving back to Florida in three weeks and I need to eat my way out of the leftovers in the freezer, because evidently there is always some part of my mind that assumes that the zombie apocalypse is right around the corner, and god forbid I don't have enough gumbo and Italian Lemon Chicken and Orzo Soup on hand to get through it all.

In the meantime, I'm using GIN to get through all of THIS!

This past week my dearest Lilypad regaled me with a description of a drink she enjoyed in DC, something with cucumber and mint and gin. Since I have recently reignited my love affair with gin, I couldn't wait to reproduce it. I suppose this would be more apropos for all my Florida friends who are basking in the warmth of the sun and sand (SOON! Soon I will be with you, my people!) because it's light and utterly refreshing and delicious. Here, here it's just snow. Snow, snow, snow, and more forking snow, endless white bullshit. I'm back to being angry about winter.

In the meantime, mix this up and pretend you're relaxing on a warm porch swing somewhere in the South. That's what I'm doing. Cheers!

In correlation with yesterday's highly educational blog post on how to mix drinks when you are broke, this is a drink served without ice, and therefore SHOULD be in a stemmed glass. But, you can totally serve this with ice, if you want to. If it's actually warm enough to warrant a need for ice, where you are. (PS, GFY.)

Cucumber Mint Martini
serves 1

 What You Need
~3 inches cucumber, peeled and diced
2 fresh mint leaves
1/4 of a lime
2 ounces gin (I'm currently experimenting with Plymouth)
1 dash bitters (optional)
tonic water, to top off

What You Do
1. Throw your diced cucumber in the bottom of a cocktail shaker. Put the mint leaves in your hand, and clap. (This releases some of the fragrance and essential oils and also makes you look cool.) Add them to the shaker along with the juice of 1/4 of a lime, and the bitters. Muddle really really really well with a muddler or a wooden spoon. Add the gin and tons of ice and shake hard for 30 seconds. Strain into a cocktail glass and top off with tonic water (you'll want a bit of that sweetness to round it out.) Serve with a fresh cucumber garnish.

25 March 2014

Lagniappe: Boozing On A Budget, Part 1

The actual FULL title of today's post is "Boozing on a Budget: Everything You Need to Have a Perfectly Well-Stocked Cocktail Bar to Get You Through The Week and Life in General" but that seemed a bit excessive.

Let's talk about cocktails! We talk about them all the time here, don't we? I like to drink. I come from a family of Europeans raised in Latin America, and we have a GRAND old time with a great whiskey or aged rum. It's in my blood. No seriously, I'm pretty sure that at any given time there is a measurable amount of alcohol in my blood somehow, someway.

To my future employers: HAHAHA! I was just kidding about that last line, of course. Move along.

Now I do love a great wine, red or white, with my personal favourites being Cabernet Sauvignon and Pinot Noir, and Sauvignon Blanc and unoaked Chardonnay, respectively. Wine is my go-to when I am legitimately stressed out and just want to unwind after a long day. Cocktails though, liquors, with their myriad of accompanying bitters, mixers, garnishes, infusions, and variations--it's an absolute PLAYGROUND for me, just as much as food is! In fact, I've got some blackberry vodka infusing on my countertop as we speak that I hope to play around with for a tangerine spritzer cocktail.

The problem is, I have no money. Boo, hiss! LIQUOR COMPANIES, PLEASE SEND ME FREE ALCOHOL! I will write about you in this most winning fashion, and you will thank me. Though my liver might not.

Until that happens (or I marry for money, whichever comes first), here's how I mix things up on a budget:

Essential Items for Cocktailing: Equipment
That's a word. I'm making it happen.


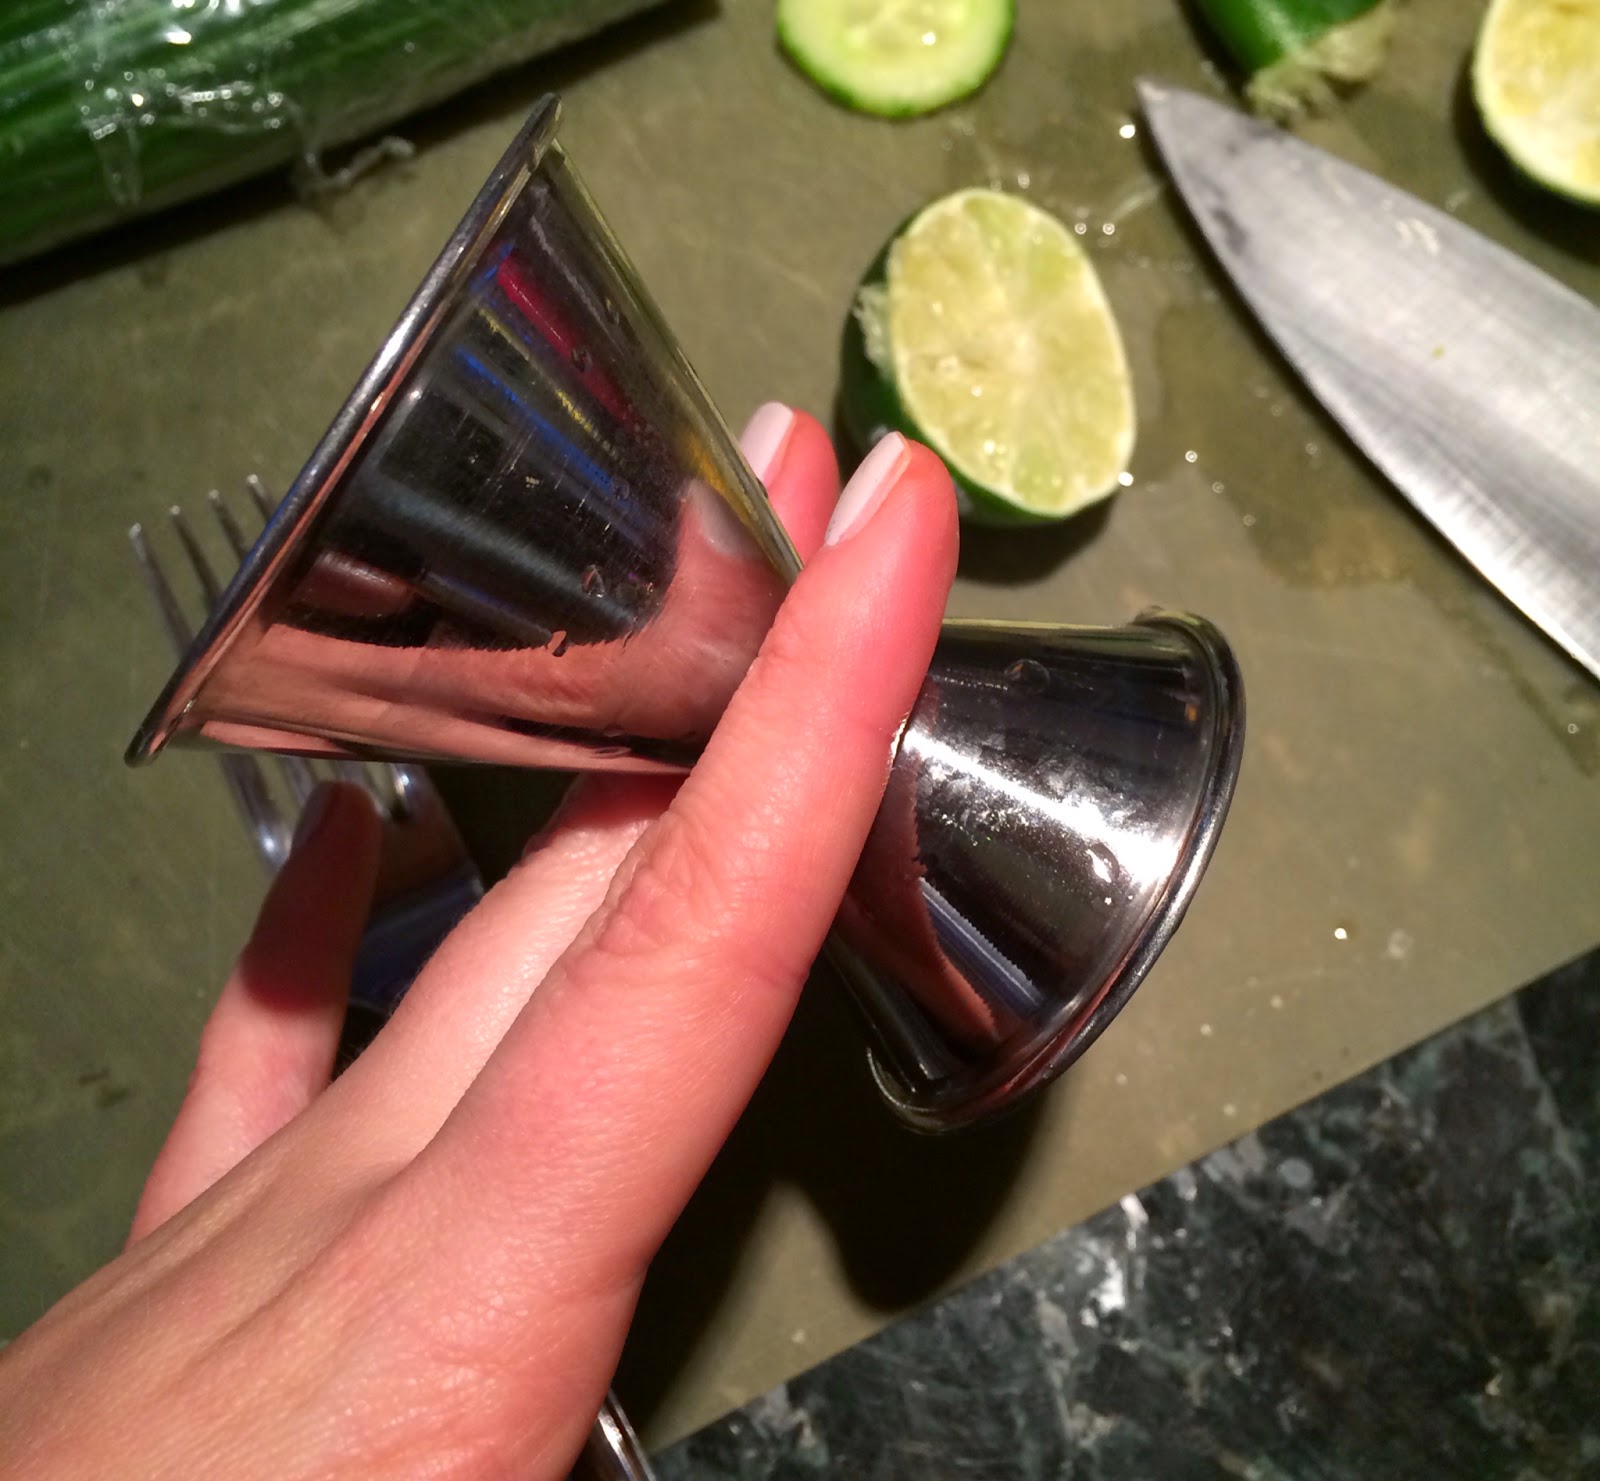
Cocktail Shaker: Whelp, I guess I fail at my own list because I don't even really have one of these. Bear and I have a cheap stainless steel one in our house that I suspect is some sort of "drinking governor" type device, because it will only let me make one drink before the metal expands to the point where I can't pry the lid off to make a second one. I DO NOT APPRECIATE BEING JUDGED ON MY DRINKING HABITS BY AN INANIMATE OBJECT. So I use a to-go coffee cup! It's metal and it has a small opening to strain out the ice. Make do, bitches.

 Yeah...I'll probably be upgrading here soon. THIS ISN'T EVEN MINE omfg why haven't my roommates kicked me out yet.

Jigger: A jigger is a double-ended shot glass, usually 2 ounces on one end and 1 ounce on the other. You can just use a regular shot glass, of course, but make sure you know exactly how much it measures. There's no real standard, so you could be pouring anywhere from 0.75 ounce to 2 ounces without realising it. For years I wondered why all my friends complained that my drinks were too strong--as it turns out, before I got a jigger I was using a Marine Corps stamped shot glass that was a deceptive 2 ounces instead of 1. Whoops. (Marine Corps...shoulda known.) 


Muddler: Another fail. I'm doing well, aren't I? A muddler is a stainless steel rod with a ridged plastic end that is used to mash up ingredients at the bottom of a glass to release oils, juices, etc as in an Old Fashioned. I use a wooden spoon. *shrug*

Glassware: This is an obvious one, but if you're really on a budget you probably only have two basic types of glasses: drinking glasses and wine glasses. If you're trendy, possibly Mason jars as well. I'm lucky to live with someone who owns a set of rocks glasses for my whiskey on the rocks (where the name comes from, obvi), Old Fashioneds, and most of the cocktails you see on this blog. We recently acquired some stemless wine glasses that I've been using as a slightly more elegant option but I'm going to have to leave both of these behind when I move next month.

It actually PAINS me a great deal that I don't have the correct set of glasses for all the drinks I want to make, because a truly classy, well-stocked cocktail bar would have the following:
  • Champagne flutes: for any cocktail that involves champagne or prosecco. The tall, slim shape allows the bubbles to emit in long thin streams and keeps them concentrated for longer. 
  • Coupes: this is probably what you envision when you think of Gatsby! Coupes are used to make a champagne tower at wedding receptions (but has anyone ACTUALLY seen that at wedding reception?!) but fell out of favour fairly quickly because the wide surface area of the mouth makes the champers lose its carbonation more quickly.
  • Martini glasses: after doing some research I realised that this is actually technically called a "cocktail glass"; it became known as the martini glass after its most popular usage. However, the general idea of a martini glass revolves around the stem; in this you serve any drink that is meant to be enjoyed cold but not actually over ice, because the stem keeps the heat of your hand away from the drink. It always strikes me as finicky to drink that way though. Hmm.
  • Rocks glasses: I call them"rocks glasses" because that's what I grew up hearing, but they're also called lowballs or Old Fashioned glasses, after their most famous (and delicious!) contents. It's a short tumbler with a thick base often used to serve drinks "on the rocks" or any drink that involves muddling of things on the bottom. A good, classic, clear glass rocks glass with a spot of Maker's Mark in it, floating around an ice sphere, is a damn beautiful site!
  • Collins glass: A tall, slim glass, the Collins glass is used to serve sippin' drinks with ice, things like Long Island Iced Teas and Whiskey Gingers, things that people drink in the South on the porch in the summer while the condensation slips down your hand. Perfection!
Y-Peeler: Like a regular vegetable peeler, but shaped like a Y. This is used to take peels of citrus fruit, usually orange or lemon, as a garnish for sophisticated cocktails. You CAN use a paring knife as well, but I find a y-peeler to be more controlled and precise. They *are* harder to find, though. 

There are also several other odds and ends for a nicely stoked bar like a strainer, a citrus squeezer, matches or a lighter to ignite citrus peels and their essential oils, a set of tongs to match an ice bucket, etc.  Ain't nobody got time (or space) for that, though.
In the absence of a rich Saudi husband, I plan to hit up some thrift stores (or my father's house--head's up Dad!) to find unique "solos" of all of those to build up my hodge-podge collection, but lemme tell you--a Carlos O'Brien tastes just as delicious in a rocks glass as it does out of a wine glass or a Mason jar or a coffee mug. I'm just saying. It's nice to be able to enjoy a cocktail in the most perfect, refined way possible, but don't let yourself get so hung up on the details that you no longer enjoy it. :)

Coming up next, the fun stuff: booze!

21 March 2014

Liquor: Rosemary Gin Rickey

Two cocktails in a row, woot woot! Yeeeaaaaaah buddy, I've been breaking out of my wine-only rut and am back to experimenting with the cocktail shaker. I think I got stuck in between ginger flavours and tequila for awhile, so I'm excited to have something new to present to you: a Rosemary Gin Rickey, from photographer Elizabeth Morrow. You can find the original recipe here.

Rosemary is a tricky ingredient, for me. It can be overwhelming at times, a strange combination of woody and floral fragrance and taste. I was intrigued to give this a try, and let me tell you, I am a full-on fan. The rosemary simple syrup is just subtle enough to that you only get a TASTE of rosemary, and the garnish of fresh rosemary provides the perfect whiff as you sip. As I noted before with the Pimm's Cup, in many cases, a cocktail garnish is NOT optional!!! A garnish serves the very important purpose of stimulating your sense of smell, which is of course closely tied to your sense of taste and part of the whole experience of a cocktail. A garnish is a complement to the drink. USE IT. 

Serve like so for effect, but of course, drop that baby tree into your drink before taking your first sip. I can't believe I actually have to tell people that, but there you go.

First, you must make the Rosemary Simple Syrup.

What You Need
makes 1 cup of simple syrup; scale as necessary

1 cup white granulated sugar
1 cup filtered water
4 sprigs fresh rosemary

What You Do
1. Making any simple syrup has the same (simple, hah) process: combine 1 part filtered water to 1 part sugar (usually white granulated) plus your flavouirng agent. You may recall we've used one before with before with the smashing Lemon Ginger Martini, with the original recipe being explained in the Carlos O'Brien. So all you do here is combine the ingredients in a small pot and bring to a boil over medium heat, stirring often to make sure the sugar doesn't burn or stick to the bottom of the pan. Let it boil for 1 minute such that the sugar is completely dissolved, then cover and remove from the heat. Let steep for 30 minutes, drain out the rosemary sprigs, and store in the fridge in an airtight container.


I absolutely adored the light, baby-spring-green colour the simple syrup wound up having (not evident in the photo above, unfortunately). You also eat with your eyes, after all! Onwards we go.

Rosemary Gin Rickey
makes 1 drink

What You Need
1 ounce rosemary simple syrup
1 ounce freshly squeezed lime juice
1.5 ounces gin
club soda (I always prefer tonic water) to top off
spring of rosemary + white granulated sugar for garnish

What You Do
1. In a cocktail shaker over lots of ice, combine the first three ingredients. Shake for 30 seconds until the shaker is frosty. Pour into a highball glass over ice and top off with bubbles to your desired strength. Moisten a sprig of rosemary with water and roll around in some white sugar to give it that pretty, frosted look.

Oh, and hint hint--this would be a fantastically complementary pre-dinner cocktail for that Short Rib Ragu.

19 March 2014

Liquor: The Dirty Drunk Girl Scout

I'm not exactly sure what to call this drink. Most of you will recognise it as the Dirty Girl Scout, but that involves Creme de Menthe and Bailey's Irish Cream, neither of which I happened to have on Sunday. What's a girl to do when she's determined to drink her dessert? Improvise! (Drunkenness is the mother of invention, right? That's how the saying goes?) That's why THIS little recipe calls for similar but different ingredients and I get to switch up the title. Figures that it becomes even more inappropriate that way, but whatever.

Beware: this drink is SWEET, much sweeter than I will ever be. These days I just want my Maker's Mark on the rocks, but when you're craving dessert and are fresh out of Thin Mints or anything else that's minty and chocolately and indulgent and delicious...well, this kind of thing happens. Join me, ladies. Your PMS will thank me later.

It's almost like a grown up milkshake? That's awesome. If you want to be fancy you can garnish with a sprig of mint, which I also, sadly, did not have on hand. Foodie problems yo.

What You Need
makes 1 cocktail

2 ounces vodka
1.5 ounces white chocolate liqueur  (I used Godiva)
1 ounce peppermint schnapps (I used what I had leftover from Christmas, but I was told by my buddy Monkey Boy to definitely try it with Rumple Minze next time for an extra kick. Meow.)
1 ounce Kahlua

What You Do

1. Easy, peasy, pudding & pie. Shake all in a cocktail shaker over ice for 30 seconds and serve, again over ice. Garnish with fresh mint if you wish, or a cookie on the side if you are REALLY suffering.


You may notice that's not your average ice cube floating there. In fact, a few weeks ago the folks over at Arctic Chill asked me if they could send me some free stuff to test , and of course the only sane answer to that question is "HELL YES!" They sent me a four-pack of these badass Ice Ball Makers and I've been messing around with them ever since. They're round, BPA-free (or so they say; I couldn't find mention of this anywhere on the box...something to think about, Arctic Chill!) silicon moulds that look like this:

 
All you do is connect the two pieces together and fill with water. Water expands as it freezes, of course, so the two pieces separate a bit but nothing crazy, and out easily pops an ice ball like this:


They melt so much slower than regular ice cubes, making them perfect for drinks on the rocks (my roommate Bear raves over these for his whiskey on the rocks) or drinks you want to keep cold without diluting terribly, just like the Dirty Girl Scout. No one likes watery cream drinks. At $20 for a 4-pack from Amazon I think they're definitely a worthy investment for your liquor cabinet. I'm going to be experimenting with them in the spring, filling them with water that's been boiled and cooled to yield a clear ice ball instead of a murky one, and possibly studding them with frozen fruit or edible flowers. You know, girly shit.

Cheers!